先日は、軽く作っただけですが、ちょっと改良してみようと思います。
Windows ストア アプリでページ間で共通の見た目を簡単に作りたい - かずきのBlog@hatena
ページのタイトルをPageTemplateコントロールのプロパティで設定できるようにする
昨日の段階ではXAML内で以下のようにDataContextにAppNameというプロパティがあるという前提でハードコーディングしていました。これだと、ちょっと自由度が低すぎるのでPageTemplateにPageTtleという名前のプロパティを用意して、それを通して設定できるようにしたいと思います。バインドできたほうがMVVM的にも自由がききそうなので依存関係プロパティとしてPageTemplateプロパティに定義します。
publicstring PageTitle
{
    get { return (string)GetValue(PageTitleProperty); }
    set { SetValue(PageTitleProperty, value); }
}

publicstaticreadonly DependencyProperty PageTitleProperty =
    DependencyProperty.Register("PageTitle",
        typeof(string),
        typeof(PageTemplate),
        new PropertyMetadata(null));
そして、Generic.xamlのページタイトルのTextBlockを以下のように書き換えます。
<!-- 書き換え前 --><TextBlock x:Name="pageTitle"Text="{Binding AppName}"Style="{StaticResource HeaderTextBlockStyle}"Grid.Column="1"IsHitTestVisible="false"TextWrapping="NoWrap"VerticalAlignment="Bottom"Margin="0,0,30,40"/><!-- 書き換え後 --><TextBlock x:Name="pageTitle"Text="{TemplateBinding PageTitle}"Style="{StaticResource HeaderTextBlockStyle}"Grid.Column="1"IsHitTestVisible="false"TextWrapping="NoWrap"VerticalAlignment="Bottom"Margin="0,0,30,40"/>
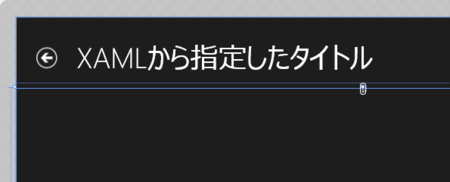
こうすると、このPageTemplateコントロールを使う側で好きなようにXAMLから(またはPageTitleプロパティと何かをバインドすることでViewModelから)設定出来るようになります。
<Pagex:Name="pageRoot"x:Class="TemplateApp.MainPage"DataContext="{Binding DefaultViewModel, RelativeSource={RelativeSource Self}}"xmlns="http://schemas.microsoft.com/winfx/2006/xaml/presentation"xmlns:x="http://schemas.microsoft.com/winfx/2006/xaml"xmlns:local="using:TemplateApp"xmlns:common="using:TemplateApp.Common"xmlns:d="http://schemas.microsoft.com/expression/blend/2008"xmlns:mc="http://schemas.openxmlformats.org/markup-compatibility/2006"mc:Ignorable="d"><local:PageTemplate PageTitle="XAMLから指定したタイトル"><Grid><!-- ここにコンテンツを置く --></Grid></local:PageTemplate></Page>
デザイナ上でも表示を確認できます。

戻るボタンを押したときの挙動
もう1つコントロール内にハードコーディングされているものとして、戻るボタンのコマンドがあります。
<Button x:Name="backButton"Margin="39,59,39,0"Command="{Binding NavigationHelper.GoBackCommand, ElementName=pageRoot}"
これもPageTitleと同様に外部から指定できるようにするのがスマートでしょう。ということで、PageTemplateクラスにICommand型のGoBackCommandプロパティを作成します。
public ICommand GoBackCommand
{
    get { return (ICommand)GetValue(GoBackCommandProperty); }
    set { SetValue(GoBackCommandProperty, value); }
}

publicstaticreadonly DependencyProperty GoBackCommandProperty =
    DependencyProperty.Register("GoBackCommand",
        typeof(ICommand),
        typeof(PageTemplate),
        new PropertyMetadata(null));
Generic.xamlの中で戻るボタンをTemplateBindingを使ってバインドするように修正します。
<Button x:Name="backButton"Margin="39,59,39,0"Command="{TemplateBinding GoBackCommand}"
これで、外部から戻るボタンの挙動を差し替えることができます。NavigationHelperクラスに依存しなくなりました。NavigationHelperクラスのGoBackCommandをページからBindingすれば、従来通りの動きをさせることも可能です。
<local:PageTemplate PageTitle="XAMLから指定したタイトル"GoBackCommand="{Binding NavigationHelper.GoBackCommand, ElementName=pageRoot}"><Grid><!-- ここにコンテンツを置く --></Grid></local:PageTemplate>
見た目をカスタマイズしたいのが一か所じゃない場合
今回の例では、タイトルから下のコンテンツ部分がページ固有のカスタマイズ領域ですが場合によっては、ヘッダーの一部の領域もページごとに固有のコンテンツを置きたいということもあると思います。そういうときは、以下のようにすればOKです。
PageTemplateクラスにカスタマイズコンテンツを格納するためのプロパティと、それの表示を定義するDataTemplate型のプロパティを定義してやります。今回はフッター部に一部カスタマイズ領域を設けるという感じで以下のような名前のプロパティを定義しました。
publicobject FooterContent
{
    get { return (object)GetValue(FooterContentProperty); }
    set { SetValue(FooterContentProperty, value); }
}

publicstaticreadonly DependencyProperty FooterContentProperty =
    DependencyProperty.Register("FooterContent",
        typeof(object),
        typeof(PageTemplate),
        new PropertyMetadata(null));

public DataTemplate FooterContentTemplate
{
    get { return (DataTemplate)GetValue(FooterContentTemplateProperty); }
    set { SetValue(FooterContentTemplateProperty, value); }
}

publicstaticreadonly DependencyProperty FooterContentTemplateProperty =
    DependencyProperty.Register("FooterContentTemplate",
        typeof(DataTemplate),
        typeof(PageTemplate),
        new PropertyMetadata(null));
Generic.xamlには、GridのRowを1行たして、そこにBorderあたりでくるんだContentControlを置いて上記で作成したプロパティをContentとContentTemplateにバインドします。
<ControlTemplate TargetType="local:PageTemplate"><Grid Background="{ThemeResource ApplicationPageBackgroundThemeBrush}"><Grid.ChildrenTransitions><TransitionCollection><EntranceThemeTransition/></TransitionCollection></Grid.ChildrenTransitions><Grid.RowDefinitions><RowDefinition Height="140"/><RowDefinition Height="*"/><RowDefinition Height="Auto"/><!-- Footer --></Grid.RowDefinitions><!-- Back button and page title --><Grid><Grid.ColumnDefinitions><ColumnDefinition Width="120"/><ColumnDefinition Width="*"/></Grid.ColumnDefinitions><Button x:Name="backButton"Margin="39,59,39,0"Command="{TemplateBinding GoBackCommand}"Style="{StaticResource NavigationBackButtonNormalStyle}"VerticalAlignment="Top"AutomationProperties.Name="Back"AutomationProperties.AutomationId="BackButton"AutomationProperties.ItemType="Navigation Button"/><TextBlock x:Name="pageTitle"Text="{TemplateBinding PageTitle}"Style="{StaticResource HeaderTextBlockStyle}"Grid.Column="1"IsHitTestVisible="false"TextWrapping="NoWrap"VerticalAlignment="Bottom"Margin="0,0,30,40"/></Grid><!-- Content is here !! --><ContentPresenter Grid.Row="1" /><!-- Footer area --><Border Grid.Row="2"Background="#FFBD4C4C"><ContentControl Content="{TemplateBinding FooterContent}"ContentTemplate="{TemplateBinding FooterContentTemplate}"HorizontalContentAlignment="Stretch"/></Border></Grid></ControlTemplate>
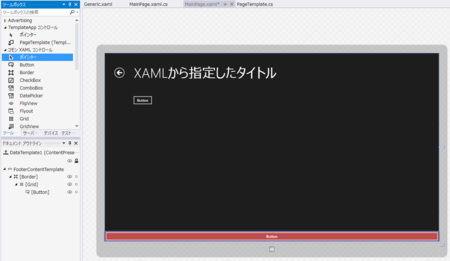
FooterContentプロパティに適当な値をつっこんだらそれがそのまま表示されますし、FooterContentTemplateをデザイナから編集して、ぽとぺたでカスタマイズすることもできます。
<local:PageTemplate PageTitle="XAMLから指定したタイトル"GoBackCommand="{Binding NavigationHelper.GoBackCommand, ElementName=pageRoot}"><local:PageTemplate.Resources><DataTemplate x:Key="DataTemplate1"><Border BorderBrush="Black"BorderThickness="1"><Grid><Button Content="Button"HorizontalAlignment="Stretch" /></Grid></Border></DataTemplate></local:PageTemplate.Resources><local:PageTemplate.FooterContentTemplate><StaticResource ResourceKey="DataTemplate1"/></local:PageTemplate.FooterContentTemplate><Grid><Button Content="Button"HorizontalAlignment="Left"Margin="115,33,0,0"VerticalAlignment="Top" /></Grid></local:PageTemplate>

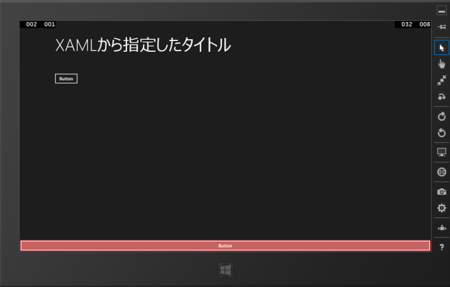
当然ですが実行してみてもデザイナでデザインした通りに画面の下にボタンが出ています。
