Vue.js ずっと気になってたんですよね。
かなり前に React やったんですが、今度は Vue.js に手を出してみたいと思います。
やるならやっぱり…
TypeScriptですよね!以下のコマンドで最新入れておきます。
npm i -g typescript
エディターの設定
Visual Studio Code の Vetur 拡張というのをお勧めされてるので入れておきました。
ブラウザーの拡張機能
デバッグが便利らしいので、ここら辺も入れておきます。(Chromeに)
もしくは、以下のコマンドで専用のツールも入れることが出来るみたい。
npm install -g @vue/devtools
ブラウザー拡張使うのが楽そう。
ガイドをやってみよう
続けて CLI ツールも入れて…と思ったのですが、最初はガイド見てみるといいよ!って書いてあるので見てます。
index.htmlというファイルを作って以下のようにコードを書きます。
<htmllang="ja"><head><scriptsrc="https://cdn.jsdelivr.net/npm/vue/dist/vue.js"></script></head><body><divid="app">
            {{ message }}
        </div><scripttype="text/javascript">var app = new Vue({                el: '#app',                data: {                    message: 'Hello Vue!'}});</script></body></html>
````

ブラウザーで表示させると…

[f:id:okazuki:20190218153735p:plain]

いいね!因みに VSCode に Live Server 拡張機能を入れてるので Go Live をぽちっとするだけで html の中身見れて最高。


[https://marketplace.visualstudio.com/items?itemName=ritwickdey.LiveServer:embed:cite]

この状態で `app.message` を書き換えるといい感じに更新される。

[f:id:okazuki:20190218154459p:plain]

そして、属性のバインドも試してみる。これもガイドにある通りに。
<div id="app-2">
        <span v-bind:title="message">
            ホバーしてね
        </span>
    </div>

    <script type="text/javascript">
        var app = new Vue({
            el: '#app',
            data: {
                message: 'Hello Vue!'
            }
        });

        var app2 = new Vue({
            el: '#app-2',
            data: {
                message: 'Hello Vue!! ' + new Date().toLocaleString(),
            }
        });
    </script>
</body>
その他にも `v-if` や `v-for` で分岐やループが出来る。

こんな感じので
- {{ message }}
こうなる

[f:id:okazuki:20190218155222p:plain]

`app.seen = false` にするとリストも消える。

[f:id:okazuki:20190218155308p:plain]

`app.seen = true` にして `app.messages.push('Added item')` すると再度表示されて要素も追加された。手軽でいいね。

[f:id:okazuki:20190218155409p:plain]

`v-on` でイベントハンドラーの追加と `v-model` で双方向バインディング。覚えたし。ということでこういうのを書くと…
- {{ x.timestamp }}: {{ x.text }}
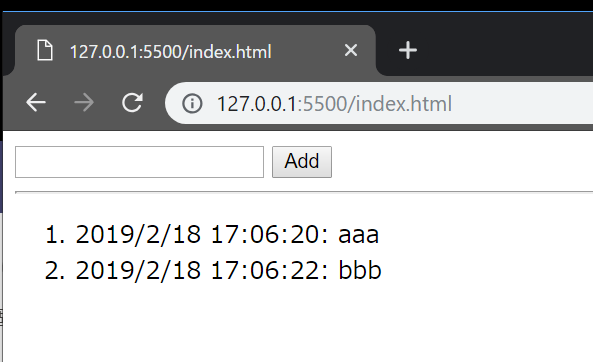
ボタンを押すとリストに追加される

[f:id:okazuki:20190218160355p:plain]

## コンポーネント

これまではアプリ 1 つで 1 つの Vue オブジェクトだったけどコンポーネントというのを作ることで小さな部品をくみたててアプリに仕立てるということが出来るみたい。

Angular でも React でも同じように小さな部品作ってくみ上げるアプローチだったのできっと Vue.js にもあるだろうと思ってたものがあった。

作り方は
Vue.component('名前', { props: [ 'プロパティ名' ], data: 初期データを返す関数, methods: { メソッド名: function() {}, } template: 'レンダリングに使用するタグ', });
という感じです。

先ほどの入力フォームと結果のリストを、それぞれコンポーネント化するとこんな感じ。
<output-list v-bind:messages="items"></output-form>
````

ガイドの中身 + αの内容はこんな感じ。じゃぁ TypeScript してみよう。
TypeScript で作ってみる
ここら辺を参考に。
上記ドキュメントにも書いてありますが公式の型定義があるのがありがたいですね。
まずは CLI ツールを入れます。
npm i -g @vue/cli
そして、以下のコマンドを打ちます。
vue create hello-world-ts
そうするとウィザードみたいなのが走るので manual を選択して babel じゃなくて TypeScript を選んで適当に進めます。とりあえず、こんな感じで。
$ vue create hello-world-ts


Vue CLI v3.4.0
? Please pick a preset: Manually select features
? Check the features needed for your project: TS, Linter
? Use class-style component syntax? Yes
? Use Babel alongside TypeScript for auto-detected polyfills? No
? Pick a linter / formatter config: TSLint
? Pick additional lint features: (Press <space> to select, <a> to toggle all, <i> to invert selection)Lint on save
? Where do you prefer placing config for Babel, PostCSS, ESLint, etc.? In dedicated config files
? Save this as a preset for future projects? No
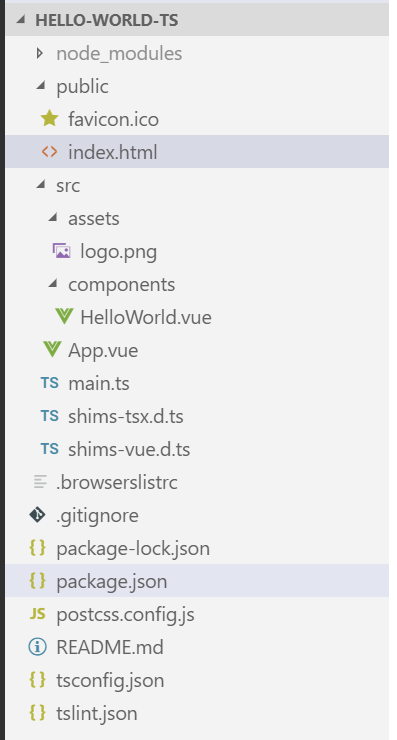
実行が終わると、こんなファイルが生成されてる。

npm run serveで開発用サーバーを立てたり、npm run buildで本番向けビルドもできる。至れり尽くせり。
.vue ファイル
ガイドからいきなりすっ飛んだ気がするけど、Vue.js でのコンポーネントの定義は最終的に .vueというのでやることになるみたい?
まぁそこらへんは今後ドキュメントを読むとして、今のところ .vueファイルには templateタグと scriptタグと styleタグがある。ここにそれぞれテンプレートの HTML とコンポーネントのクラスの定義と、CSS が定義されているように見える。
ということで、新たに components フォルダーに InputForm.vueと OutputList.vueを作って内容を以下のようにしてみた。
まずは InputForm.vue
<template><div><inputtype="text" v-model="input" /><button v-on:click="addItem">Add</button></div></template><scriptlang='ts'>import{ Component, Prop, Vue, Emit } from 'vue-property-decorator';@Componentexportdefaultclass InputForm extends Vue {public input: string = "";public addItem(){this.addClick(this.input);this.input = "";}    @Emit('add-click')
private addClick(value: string){}}</script>
次に OutputList.vue
<template><ol><li v-for="x in messages">
            {{ x.timestamp }}: {{ x.text }}
        </li></ol></template><scriptlang="ts">import{ Component, Prop, Vue } from 'vue-property-decorator';import{ Message } from '../Message';@Componentexportdefaultclass OutputList extends Vue {    @Prop()
public messages!: Message[];}</script>
そして App.vue
<template><divid="app"><InputForm v-on:add-click='onAddClick'></InputForm><hr /><OutputList v-bind:messages="items"></OutputList></div></template><scriptlang="ts">import{ Component, Vue } from 'vue-property-decorator';import InputForm from './components/InputForm.vue';import OutputList from './components/OutputList.vue';import{ Message } from './Message';@Component({  components: {    InputForm, OutputList},})
exportdefaultclass App extends Vue {  items: Message[] = [];  onAddClick(x: string){this.items.push(new Message(x));}}</script>
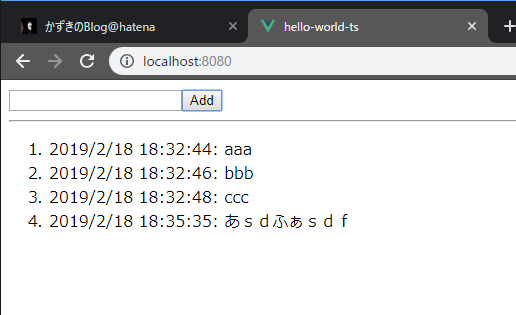
これで実行すると動いた!

とりあえず、今日はこんなところで。