DataFactoryでコピーするだけなのにうまくいかない
何が足りてないんだろう要調査。誰か教えて。
やったこと
まず、East US2(DataLakeの置き場の都合)にData Lake StoreとSQL Databaseを作成します。
SQL Database側に以下のようなテーブルを定義しておきます。
CREATETABLE [dbo].[People]
(
    [Id] INT NOTNULL PRIMARY KEY
    , [Name] nvarchar(256) NOTNULL
)
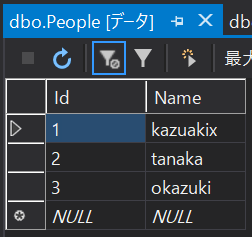
そして、以下のようなデータを適当につっこんでおきます。

Azure DataFactoryのVisual Studioプラグインを入れてVSからいじれるようにしておきます。
visualstudiogallery.msdn.microsoft.com
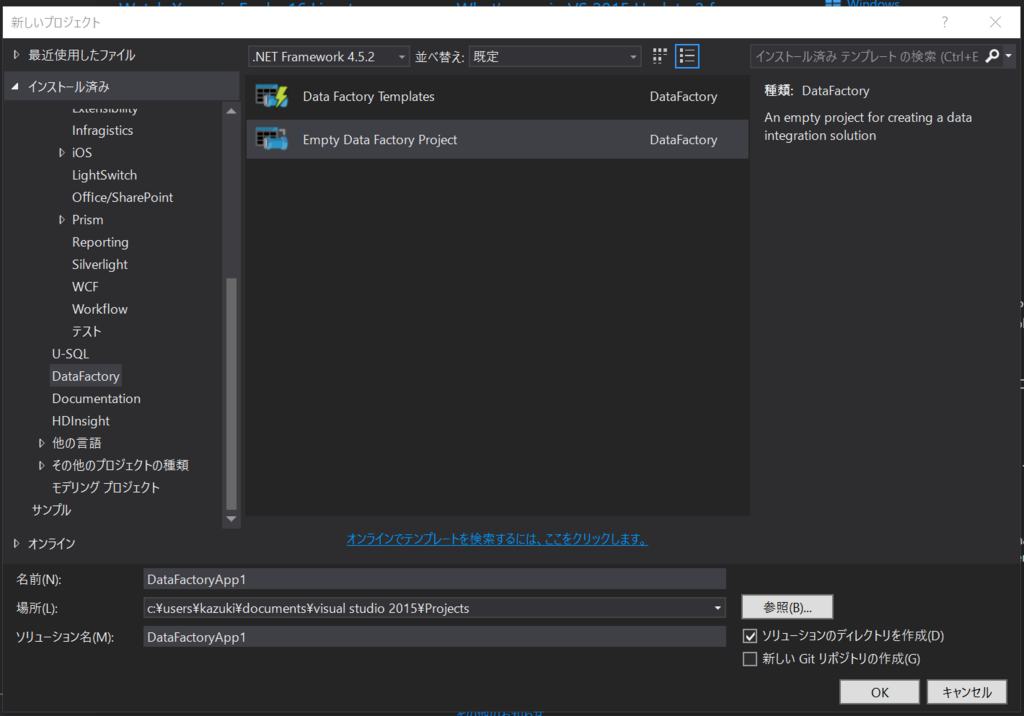
そうすると、プロジェクトの新規作成にDataFactoryが追加されるので、その中のEmpty Data Factory Projectを選択して作成します。

LinkedServicesで追加の新規作成で先ほど作ったSQL Databaseへのリンクを作りましょう。「Azure SQL Linked Service」がそれっぽいです。
JSONが作られるのでサーバー名とかを先ほど作ったサーバーの名前に置き換えてJSONを完成させます。
{
    "$schema": "http://datafactories.schema.management.azure.com/schemas/2015-09-01/Microsoft.DataFactory.LinkedService.json",
    "name": "AzureSqlLinkedService1",
    "properties": {
        "type": "AzureSqlDatabase",
        "typeProperties": {
            "connectionString": "Data Source=tcp:dfsampleserver.database.windows.net,1433;Initial Catalog=dfsample;User ID=okazuki@dfsampleserver;Password=*******;Integrated Security=False;Encrypt=True;Connect Timeout=30"
        }
    }
}
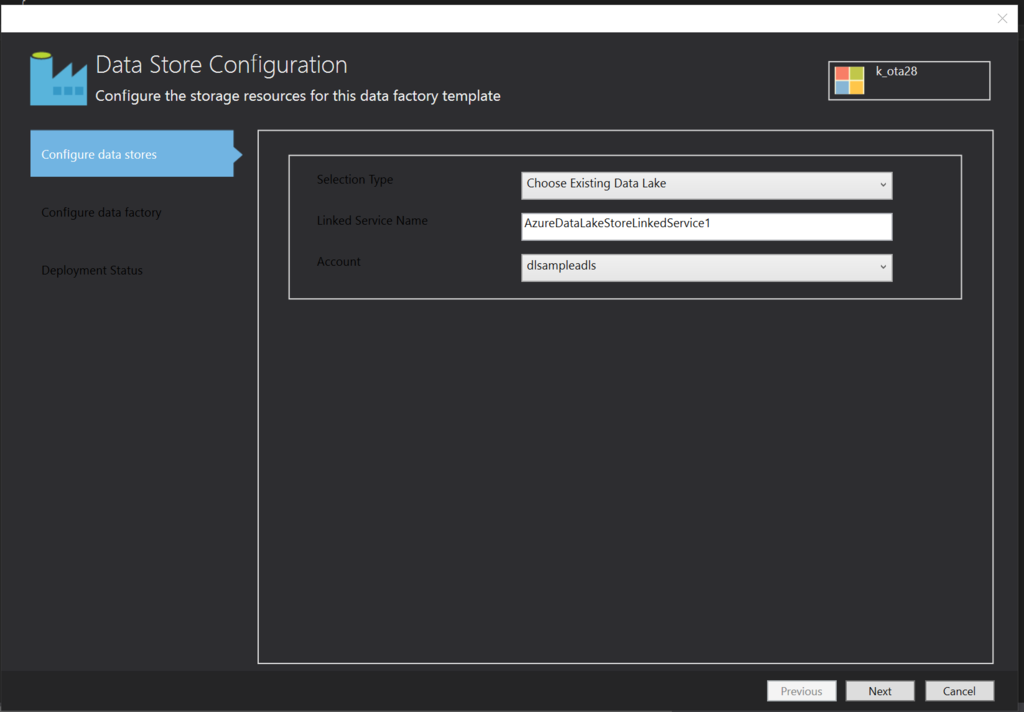
続けて保存先のData Lake Store(こちらもあらかじめ作っておきましょう)のLinkedServiceを作っておきます。「Azure Data Lake Store linked Service」がそれっぽいです。 こちらは、SQL Databaseのような硬派はJSONいじれよという感じじゃなくて、既存のData Lakeから選択させるようなUIが出ます。全部こうならいいのに。

Nextを押すとData Factory Configurationに進むので、なんか作っておきましょう。
...
Visual Studioが異常終了しました。
ポータルでやろう
Visual Studioが何度やっても異常終了するのでポータルに戦場をうつします。
DataFactoryを新規作成します。名前はokazukidfにしました。リージョンはNorth Europeです。 okazukidfを選択して「Author and deploy」を選択します。

New data storeを選択して生成されるJSONのservernameとかを埋めます。
{
    "name": "AzureSqlLinkedService",
    "properties": {
        "type": "AzureSqlDatabase",
        "description": "",
        "typeProperties": {
            "connectionString": "Data Source=tcp:dfsampleserver.database.windows.net,1433;Initial Catalog=dfsample;User ID=okazuki@dfsampleserver;Password=********;Integrated Security=False;Encrypt=True;Connect Timeout=30"
        }
    }
}
入力したらDeployを押します。
Data Lake Storeも追加して、画面上部にあるAuthrizeボタンを押して認証をさせます。
dataLakeStoreUriにadl://ではじまるURLをつっこんでDeployします。
{
    "name": "AzureDataLakeStoreLinkedService",
    "properties": {
        "type": "AzureDataLakeStore",
        "description": "",
        "typeProperties": {
            "authorization": "********",
            "dataLakeStoreUri": "adl://********.azuredatalakestore.net",
            "sessionId": "********"
        }
    }
}
次にNew datasetを選らんでDatasetを作ります。Azure SQLを選んで生成されたJSONをもとにぽちぽち頑張ります。
{
    "name": "AzureSQLDatasetTemplate",
    "properties": {
        "type": "AzureSqlTable",
        "linkedServiceName": "AzureSqlLinkedService",
        "structure": [],
        "typeProperties": {
            "tableName": "People"
        },
        "availability": {
            "frequency": "Minute",
            "interval": 15
        }
    }
}
linkedServiceNameに、先ほど作ったSQL DatabaseへのLinkedServiceの名前を入れるのがぽいんとです。
DataLake Storeも同じ要領で作ります。ここら辺から心が折れてきます。
{
    "name": "AzureDataLakeStoreDatasetTemplate",
    "properties": {
        "type": "AzureDataLakeStore",
        "linkedServiceName": "AzureDataLakeStoreLinkedService",
        "structure": [
            {
                "name": "ID,Name",
                "type": "int,string"
            }
        ],
        "typeProperties": {
            "folderPath": "/data/dfsample",
            "fileName": "People.csv",
            "format": {
                "type": "TextFormat"
            },
            "partitionedBy": [
                {
                    "name": "Year",
                    "value": {
                        "type": "DateTime",
                        "date": "SliceStart",
                        "format": "yyyy"
                    }
                },
                {
                    "name": "Month",
                    "value": {
                        "type": "DateTime",
                        "date": "SliceStart",
                        "format": "MM"
                    }
                },
                {
                    "name": "Day",
                    "value": {
                        "type": "DateTime",
                        "date": "SliceStart",
                        "format": "dd"
                    }
                },
                {
                    "name": "Hour",
                    "value": {
                        "type": "DateTime",
                        "date": "SliceStart",
                        "format": "HH"
                    }
                }
            ]
        },
        "availability": {
            "frequency": "Minute",
            "interval": 15
        }
    }
}
心が折れるにはまだ早い、New pipelineをクリックしていきます。startとendに適当な日付を入れたらAdd activityを選択しましょう。 Copy activityを選択します
適当にJSONを埋めます(心が折れた)
{
    "name": "PipelineTemplate",
    "properties": {
        "description": "description",
        "activities": [
            {
                "name": "CopyActivityTemplate",
                "type": "Copy",
                "inputs": [
                    {
                        "name": "AzureSQLDatasetTemplate"
                    }
                ],
                "outputs": [
                    {
                        "name": "AzureDataLakeStoreDatasetTemplate"
                    }
                ],
                "typeProperties": {
                    "source": {
                        "type": "SqlSource",
                        "sqlReaderQuery": "select * from People"
                    },
                    "sink": {
                        "type": "BlobSink"
                    }
                },
                "policy": {
                    "concurrency": 1,
                    "executionPriorityOrder": "OldestFirst",
                    "retry": 3,
                    "timeout": "01:00:00"
                },
                "scheduler": {
                    "frequency": "Minute",
                    "interval": 15
                }
            }
        ],
        "start": "2014-05-01T00:00:00Z",
        "end": "2019-05-05T00:00:00Z"
    }
}
これで放置しておいても、一向にデータがコピーされる気配がない。何が悪いんだろうか。