Windows 10 TP時点の情報です。
Windows 10 TPのUAPでは、RelativePanelという新しいレイアウト用のPanelが提供されています。これを使うと複雑なレイアウトでもVisualTreeをシンプルに保ったまま作れるみたいです。ということで少し触ってみました。
レイアウトの考え方
RelativePanelは名前の通り、別のコントロールからの相対位置とMarginを指定してレイアウトを決めるコントロールです。デフォルトでは、パネルの左上を原点となっています。
レイアウトの原点の変え方
RelativePanelの以下の添付プロパティを使って、別コントロールを起点にしてMarginをきかすようにできます。
- Avobe : 指定したコントロールの上
- Below : 指定したコントロールの下
- LeftOf : 指定したコントロールの左
- RightOf : 指定したコントロールの右
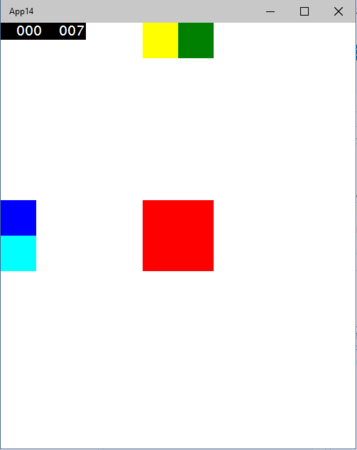
<RelativePanel><!-- 真ん中に置いた基準になる矩形 --><Rectangle x:Name="Origin"Width="100"Height="100"Fill="Red"RelativePanel.AlignHorizontalCenterWithPanel="True"RelativePanel.AlignVerticalCenterWithPanel="True" /><!-- Above, Below, LeftOf, RightOf --><Rectangle Width="50"Height="50"Fill="Blue"RelativePanel.Above="{Binding ElementName=Origin}" /><Rectangle Width="50"Height="50"Fill="Cyan"RelativePanel.Below="{Binding ElementName=Origin}" /><Rectangle Width="50"Height="50"Fill="Yellow"RelativePanel.LeftOf="{Binding ElementName=Origin}" /><Rectangle Width="50"Height="50"Fill="Green"RelativePanel.RightOf="{Binding ElementName=Origin}" /></RelativePanel>
上記のようなXAMLを記述すると以下のような結果になります。

Alignの指定
どの要素の上下左右に置くかという指定の他に、上端、下端、左端、右端に合わせるという指定方法があります。以下のような添付プロパティで指定します。‘
- AlighTopWith : 上端に合わせる
- AlignBottomWith : 下端に合わせる
- AlignLeftWith : 左端に合わせる
- AlignRightWith : 右端に合わせる
この他に真ん中に合わせる
- AlignHorizontalCenterWith : 水平方向の真ん中に合わせる
- AlignVerticalCenterWith : 垂直方向の真ん中に合わせる
があります。先ほどのAvobe, Below, LeftOf, RightOfのプログラムをAlignに置き換えたXAMLを以下に示します。
<RelativePanel><!-- 真ん中に置いた基準になる矩形 --><Rectangle x:Name="Origin"Width="100"Height="100"Fill="Red"RelativePanel.AlignHorizontalCenterWithPanel="True"RelativePanel.AlignVerticalCenterWithPanel="True" /><!-- Top, Bottom, Left, Right--><Rectangle Width="50"Height="50"Fill="Blue"RelativePanel.AlignTopWith="{Binding ElementName=Origin}" /><Rectangle Width="50"Height="50"Fill="Cyan"RelativePanel.AlignBottomWith="{Binding ElementName=Origin}" /><Rectangle Width="50"Height="50"Fill="Yellow"RelativePanel.AlignLeftWith="{Binding ElementName=Origin}" /><Rectangle Width="50"Height="50"Fill="Green"RelativePanel.AlignRightWith="{Binding ElementName=Origin}" /></RelativePanel>
実行すると以下のようになります。

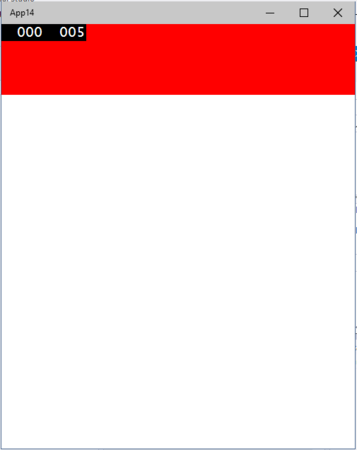
Align系にはAlight****WithPanelというBooleanを受け取るパネルに対して上端、下端、左端、右端を揃えるプロパティがあります。これを組み合わせて指定することで上いっぱいに広がるコントロールをレイアウトしたりできます。‘
<RelativePanel><Rectangle x:Name="Origin"Fill="Red"Height="100"RelativePanel.AlignLeftWithPanel="True"RelativePanel.AlignRightWithPanel="True" /></RelativePanel>

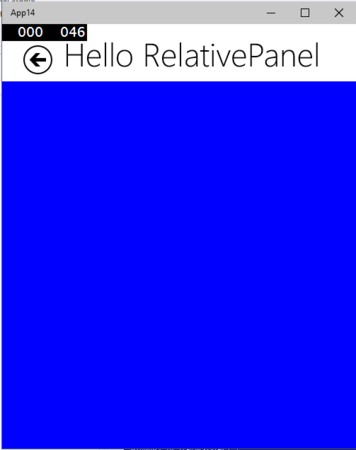
最後にこれらを組み合わせてストアアプリでありがちなレイアウトを組んでみました。
<Pagex:Class="App14.MainPage"xmlns="http://schemas.microsoft.com/winfx/2006/xaml/presentation"xmlns:x="http://schemas.microsoft.com/winfx/2006/xaml"xmlns:local="using:App14"xmlns:d="http://schemas.microsoft.com/expression/blend/2008"xmlns:mc="http://schemas.openxmlformats.org/markup-compatibility/2006"mc:Ignorable="d"><Grid Background="{ThemeResource ApplicationPageBackgroundThemeBrush}"><RelativePanel><Button x:Name="BackButton"Style="{StaticResource NavigationBackButtonNormalStyle}"Margin="30,30,0,0"/><TextBlock x:Name="TitleText"Text="Hello RelativePanel"Style="{StaticResource HeaderTextBlockStyle}"Margin="20,10,0,0"RelativePanel.RightOf="{Binding ElementName=BackButton}"/><Border x:Name="ContentBorder"Margin="0,10,0,0"Background="Blue"RelativePanel.Below="{Binding ElementName=BackButton}"RelativePanel.AlignLeftWithPanel="True"RelativePanel.AlignRightWithPanel="True"RelativePanel.AlignBottomWithPanel="True"></Border></RelativePanel></Grid></Page>

以上、簡単にですがRelativePanelの基本的な使い方でした。