UWP appでは、従来のデータバインディングに加えてコンパイル時データバインディングというものが追加されています。コンパイル時データバインディングは、名前の通り従来は実行時にやっていた色々な処理をコンパイル時に行ってしまうというものです。これにより、データバインディングを多用するアプリ(XAML系アプリケーションの場合は大体そうですよね)での性能向上が見込めます。
シンプルなデータバインド
コンパイル時データバインディングを使う上で大きく異なる点が2つあります。
1つ目が、マークアップ拡張が{Binding ...}ではなく{x:Bind ...}というものを使うという点です。2つ目がPathの起点となるのが従来のデータバインディングではDataContextプロパティだったのが、コンパイル時データバインディングではPageを起点とする点です。
実際にやってみたいと思います。SimpleBindingというアプリケーションを作って単純なプロパティを持っただけのシンプルなViewModelを作成します。
namespace SimpleBinding
{
    publicclass MainPageViewModel
    {
        publicstring Name { get; } = "okazuki";
    }
}
そして、MainPageクラスに以下のようにViewModelという名前(名前はなんでもいいです)のプロパティを作ります。
using Windows.UI.Xaml.Controls;

// 空白ページのアイテム テンプレートについては、http://go.microsoft.com/fwlink/?LinkId=402352&clcid=0x409 を参照してくださいnamespace SimpleBinding
{
    /// <summary>/// それ自体で使用できる空白ページまたはフレーム内に移動できる空白ページ。/// </summary>publicsealedpartialclass MainPage : Page
    {
        public MainPageViewModel ViewModel { get; } = new MainPageViewModel();

        public MainPage()
        {
            this.InitializeComponent();
        }
    }
}
そして、このViewModelプロパティを指定してXAMLでバインドします。
<Page x:Class="SimpleBinding.MainPage"xmlns="http://schemas.microsoft.com/winfx/2006/xaml/presentation"xmlns:x="http://schemas.microsoft.com/winfx/2006/xaml"xmlns:local="using:SimpleBinding"xmlns:d="http://schemas.microsoft.com/expression/blend/2008"xmlns:mc="http://schemas.openxmlformats.org/markup-compatibility/2006"mc:Ignorable="d"><Grid Background="{ThemeResource ApplicationPageBackgroundThemeBrush}"><TextBlock Text="{x:Bind ViewModel.Name}"Style="{ThemeResource BodyTextBlockStyle}"/></Grid></Page>
実行すると以下のようになります。

Modeの違い
次にコンパイル時データバインディングが従来のデータバインディングと異なる点は、Modeのデフォルト値です。従来のデータバインディングがOneWayがデフォルトだったのに対してコンパイル時データバインディングは、OneTimeがデフォルトになります。このため、INotifyPropertyChangedを実装したプロパティをバインドしても、値の変更は画面に反映されません。
実際にOneWayBindingというプロジェクトを作って試してみます。このようにINotifyPropertyChangedを実装したViewModelを作成します。
using System.ComponentModel;

namespace OneWayBinding
{
    publicclass MainPageViewModel : INotifyPropertyChanged
    {
        publicevent PropertyChangedEventHandler PropertyChanged;

        privatestaticreadonly PropertyChangedEventArgs NamePropertyChangedEventArgs = new PropertyChangedEventArgs(nameof(Name));

        privatestring name = "okazuki";

        publicstring Name
        {
            get { returnthis.name; }
            set
            {
                if (this.name == value) { return; }
                this.name = value;
                this.PropertyChanged?.Invoke(this, NamePropertyChangedEventArgs);
            }
        }

    }
}
そして、MainPageクラスにViewModelというプロパティで使えるようにします。
using Windows.UI.Xaml.Controls;

// 空白ページのアイテム テンプレートについては、http://go.microsoft.com/fwlink/?LinkId=402352&clcid=0x409 を参照してくださいnamespace OneWayBinding
{
    /// <summary>/// それ自体で使用できる空白ページまたはフレーム内に移動できる空白ページ。/// </summary>publicsealedpartialclass MainPage : Page
    {
        public MainPageViewModel ViewModel { get; } = new MainPageViewModel();

        public MainPage()
        {
            this.InitializeComponent();
        }
    }
}
そして、以下のように、デフォルトのままのx:BindとModeをOneWayにしたx:Bindを指定したTextBlockを並べます。
<Page x:Class="OneWayBinding.MainPage"
      xmlns="http://schemas.microsoft.com/winfx/2006/xaml/presentation"      xmlns:x="http://schemas.microsoft.com/winfx/2006/xaml"      xmlns:local="using:OneWayBinding"      xmlns:d="http://schemas.microsoft.com/expression/blend/2008"      xmlns:mc="http://schemas.openxmlformats.org/markup-compatibility/2006"      mc:Ignorable="d">

    <StackPanel Background="{ThemeResource ApplicationPageBackgroundThemeBrush}">
        <TextBlock Text="デフォルト"
                   Style="{ThemeResource TitleTextBlockStyle}" />
        <TextBlock Text="{x:Bind ViewModel.Name}"
                   Style="{ThemeResource BodyTextBlockStyle}" />

        <TextBlock Text="OneWay"
                   Style="{ThemeResource TitleTextBlockStyle}" />
        <TextBlock Text="{x:Bind ViewModel.Name, Mode=OneWay}"
                   Style="{ThemeResource BodyTextBlockStyle}" />

        <Button Content="ChangeName"
                Click="Button_Click" />
    </StackPanel>
</Page>
ボタンのクリックイベントハンドラでNameプロパティを書き換えます。
using Windows.UI.Xaml.Controls;

// 空白ページのアイテム テンプレートについては、http://go.microsoft.com/fwlink/?LinkId=402352&clcid=0x409 を参照してくださいnamespace OneWayBinding
{
    /// <summary>/// それ自体で使用できる空白ページまたはフレーム内に移動できる空白ページ。/// </summary>publicsealedpartialclass MainPage : Page
    {
        public MainPageViewModel ViewModel { get; } = new MainPageViewModel();

        public MainPage()
        {
            this.InitializeComponent();
        }

        privatevoid Button_Click(object sender, Windows.UI.Xaml.RoutedEventArgs e)
        {
            this.ViewModel.Name = "kazuakix";
        }
    }
}
実行すると以下のようになります。

ボタンを押すと、以下のようにOneWayを指定したほうだけデータが書き換わるのがわかります。

コントロールのバインディング
従来のバインディングでElementNameを指定していたコントロールのバインディングは、Pathにコントロール名を直接指定するだけでいいようになっています。Pathの起点がページなので当然の動作といえば当然の動作ですね。ControlBindingという名前のプロジェクトを作って動作を見てみます。
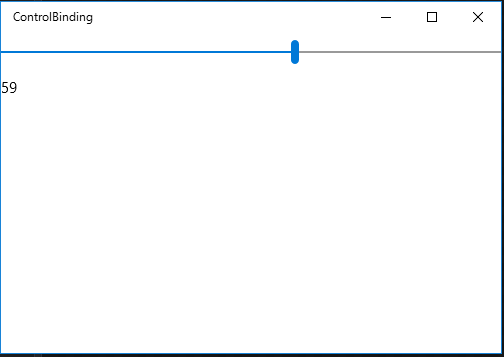
SliderとTextBlockを置いて、Sliderの値とTextBlockのTextをバインドしています。
<Page x:Class="ControlBinding.MainPage"xmlns="http://schemas.microsoft.com/winfx/2006/xaml/presentation"xmlns:x="http://schemas.microsoft.com/winfx/2006/xaml"xmlns:local="using:ControlBinding"xmlns:d="http://schemas.microsoft.com/expression/blend/2008"xmlns:mc="http://schemas.openxmlformats.org/markup-compatibility/2006"mc:Ignorable="d"><StackPanel Background="{ThemeResource ApplicationPageBackgroundThemeBrush}"><Slider x:Name="Slider" /><TextBlock Text="{x:Bind Slider.Value, Mode=OneWay}"Style="{ThemeResource BodyTextBlockStyle}" /></StackPanel></Page>
ポイントはSliderにx:Nameで名前を付けている点と、その名前を使ってTextBlockでバインドしている点になります。実行すると以下のようにSliderの値とTextBlockの値が連動していることがわかります。
イベントのバインディング
コンパイル時バインディングでは、イベントのバインドも行えるようになっています。 例えばButtonのClickイベントをViewModelにバインドする場合は以下のように行えます。EventBindingという名前のプロジェクトを作って以下のようなViewModelを作成します。
イベントに紐づけできるメソッドは、引数無しと、object型の引数が2つあるものと、普通のイベントハンドラの形の引数のものの3パターンがあります。
using System;
using Windows.UI.Popups;
using Windows.UI.Xaml;

namespace EventBinding
{
    publicclass MainPageViewModel
    {
        public async void Click1()
        {
            var d = new MessageDialog("Click1");
            await d.ShowAsync();
        }

        public async void Click2(object sender, object e)
        {
            var d = new MessageDialog("Click2");
            await d.ShowAsync();
        }

        public async void Click3(object sender, RoutedEventArgs e)
        {
            var d = new MessageDialog("Click3");
            await d.ShowAsync();
        }


    }
}
PageにViewModelプロパティを定義します。
using Windows.UI.Xaml.Controls;

// 空白ページのアイテム テンプレートについては、http://go.microsoft.com/fwlink/?LinkId=402352&clcid=0x409 を参照してくださいnamespace EventBinding
{
    /// <summary>/// それ自体で使用できる空白ページまたはフレーム内に移動できる空白ページ。/// </summary>publicsealedpartialclass MainPage : Page
    {
        public MainPageViewModel ViewModel { get; } = new MainPageViewModel();

        public MainPage()
        {
            this.InitializeComponent();
        }
    }
}
そして、XAMLでViewModelのイベントにバインドします。イベントの指定の仕方は単純にイベントへのパスを指定するだけです。
<Pagex:Class="EventBinding.MainPage"xmlns="http://schemas.microsoft.com/winfx/2006/xaml/presentation"xmlns:x="http://schemas.microsoft.com/winfx/2006/xaml"xmlns:local="using:EventBinding"xmlns:d="http://schemas.microsoft.com/expression/blend/2008"xmlns:mc="http://schemas.openxmlformats.org/markup-compatibility/2006"mc:Ignorable="d"><StackPanel Background="{ThemeResource ApplicationPageBackgroundThemeBrush}"><Button Content="Button1"Click="{x:Bind ViewModel.Click1}" /><Button Content="Button2"Click="{x:Bind ViewModel.Click2}" /><Button Content="Button3"Click="{x:Bind ViewModel.Click3}" /></StackPanel></Page>
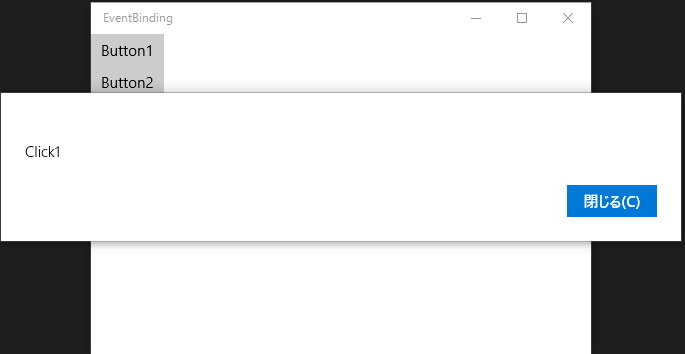
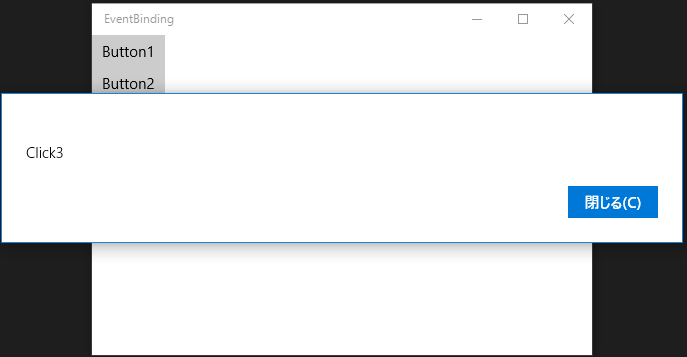
実行してボタンをクリックするとメッセージボックスが表示されます。

TextBoxのバインディング
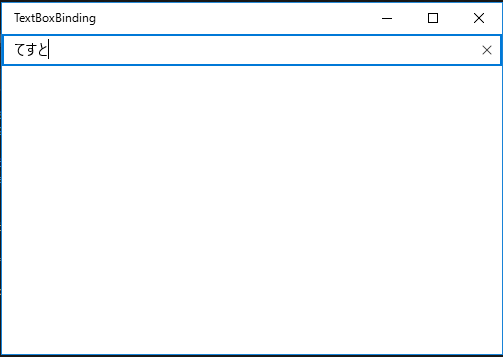
TextBoxのTextプロパティは特別扱いされています。ほかのプロパティが値が変わったタイミングで変更が入るのに対して、TextBoxのTextプロパティはフォーカスが外れたタイミングで値が変わります。
TextBoxBindingというプロジェクトを作ってTextBoxとTextBlockの間をTwoWayバインディングをします。TwoWayバインディングのほかの注意点としては、依存関係プロパティじゃないとダメという点があったりします。
<Page x:Class="TextBoxBinding.MainPage"xmlns="http://schemas.microsoft.com/winfx/2006/xaml/presentation"xmlns:x="http://schemas.microsoft.com/winfx/2006/xaml"xmlns:local="using:TextBoxBinding"xmlns:d="http://schemas.microsoft.com/expression/blend/2008"xmlns:mc="http://schemas.openxmlformats.org/markup-compatibility/2006"mc:Ignorable="d"><StackPanel Background="{ThemeResource ApplicationPageBackgroundThemeBrush}"><TextBox x:Name="TextBox"Text="{x:Bind TextBlock.Text, Mode=TwoWay}" /><TextBlock x:Name="TextBlock"Style="{ThemeResource BodyTextBlockStyle}" /></StackPanel></Page>
実行して動作を確認します。文字を打ち込んだだけの時点ではTextBlockに変更が反映されません。
フォーカスを外すと変更が反映されます。

コレクションのバインディング
ItemsSourceプロパティにコレクションをバインドすることでコレクションのバインドもできます。CollectionBindingというプロジェクトを作って以下のようなコレクションに表示する項目を表すクラスを作ります。
using System.ComponentModel;

namespace CollectionBinding
{
    publicclass Person : INotifyPropertyChanged
    {
        publicevent PropertyChangedEventHandler PropertyChanged;

        privatestaticreadonly PropertyChangedEventArgs NamePropertyChangedEventArgs = new PropertyChangedEventArgs(nameof(Name));

        privatestring name;

        publicstring Name
        {
            get { returnthis.name; }
            set
            {
                if (this.name == value) { return; }
                this.name = value;
                this.PropertyChanged?.Invoke(this, NamePropertyChangedEventArgs);
            }
        }
    }
}
そして、Personクラスのコレクションを持ったMainPageViewModelクラスを作ります。
using System.Collections.ObjectModel;
using System.Linq;

namespace CollectionBinding
{
    publicclass MainPageViewModel
    {
        public ObservableCollection<Person> People { get; } = new ObservableCollection<Person>();

        public MainPageViewModel()
        {
            var source = Enumerable.Range(1, 100)
                .Select(x => new Person { Name = "okazuki" + x });
            foreach (var p in source) { this.People.Add(p); }
        }
    }
}
MainPageクラスにViewModelプロパティを追加します。
using Windows.UI.Xaml.Controls;

// 空白ページのアイテム テンプレートについては、http://go.microsoft.com/fwlink/?LinkId=402352&clcid=0x409 を参照してくださいnamespace CollectionBinding
{
    /// <summary>/// それ自体で使用できる空白ページまたはフレーム内に移動できる空白ページ。/// </summary>publicsealedpartialclass MainPage : Page
    {
        public MainPageViewModel ViewModel { get; } = new MainPageViewModel();

        public MainPage()
        {
            this.InitializeComponent();
        }
    }
}
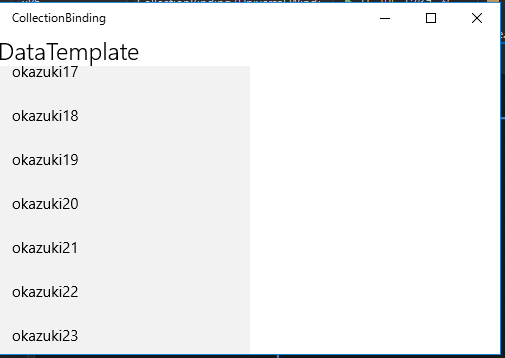
そして、ListBoxなどのコレクションを表示するコントロールのItemsSourceにコレクションをバインドします。このとき、データを表示するためのDataTemplateを指定することがほとんどだと思いますが、DataTemplate内でコンパイル時バインディングを使うにはx:DataType属性でDataTemplateに表示される型を指定する必要があります。
ListBoxにViewModelのPeopleプロパティをバインドして、DataTemplateでPersonクラスを表示する場合は以下のように書きます。
<ListBox ItemsSource="{x:Bind ViewModel.People}"Grid.Row="1"><ListBox.ItemTemplate><DataTemplate x:DataType="local:Person"><TextBlock Text="{x:Bind Name}"Style="{ThemeResource BodyTextBlockStyle}" /></DataTemplate></ListBox.ItemTemplate></ListBox>
実行すると以下のような見た目になります。
ItemTemplateにUserControlを指定する場合
ItemTemplateの中身をUserControlにすることはよくあると思います。その場合にコンパイル時バインディングを使うには、UserControlにViewModelというDataContextプロパティをキャストして公開するプロパティを定義します。
以下のようになります。
PersonViewというUserControlを作ってPerson型のViewModel依存関係プロパティを作ります。
using Windows.UI.Xaml.Controls;

namespace CollectionBinding
{
    publicsealedpartialclass PersonView : UserControl
    {
        public Person ViewModel => this.DataContext as Person;

        public PersonView()
        {
            this.InitializeComponent();
            this.DataContextChanged += (_, __) => this.Bindings.Update();
        }
    }
}
Bindingsプロパティについて

コンパイル時バインディングを使うとBindingsプロパティというものがViewに定義されます。
これのUpdateメソッドを呼び出すとすべてのコンパイル時バインディングを強制的に再評価するものになります。
DataContextが変わる度に、コンパイル時データバインディングを再評価している点がポイントです。
そして、UserControlのXAMLでPersonクラスの見た目を定義します。
<UserControl x:Class="CollectionBinding.PersonView"xmlns="http://schemas.microsoft.com/winfx/2006/xaml/presentation"xmlns:x="http://schemas.microsoft.com/winfx/2006/xaml"xmlns:local="using:CollectionBinding"xmlns:d="http://schemas.microsoft.com/expression/blend/2008"xmlns:mc="http://schemas.openxmlformats.org/markup-compatibility/2006"mc:Ignorable="d"d:DesignHeight="300"d:DesignWidth="400"><StackPanel><TextBlock Text="名前"Style="{ThemeResource TitleTextBlockStyle}" /><TextBlock Text="{x:Bind Name}" /></StackPanel></UserControl>
これをItemTemplateに設定します。
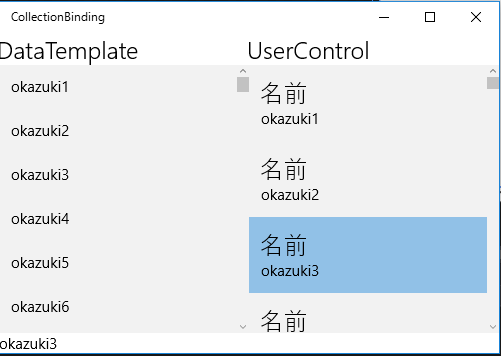
<ListBox ItemsSource="{x:Bind ViewModel.People}"Grid.Row="1"Grid.Column="1"><ListBox.ItemTemplate><DataTemplate><local:PersonView /></DataTemplate></ListBox.ItemTemplate></ListBox>
実行すると以下のようになります。

Converter
コンパイル時バインディングも、Converterを使うことができます。通常のConverterのとしての使い方の他にコンパイル時に型解決を行う関係上いけてない仕様になってしまっているところでもちょっと使うことがあります。 先ほどのコレクションのBindingで、SelectedItemとViewModelに定義した以下のようなプロパティをバインドするとコンパイルエラーになります。
<ListBox ItemsSource="{x:Bind ViewModel.People}"SelectedItem="{x:Bind ViewModel.SelectedItem, Mode=TwoWay}"Grid.Row="1"Grid.Column="1"><ListBox.ItemTemplate><DataTemplate><local:PersonView /></DataTemplate></ListBox.ItemTemplate></ListBox><TextBlock Text="{x:Bind ViewModel.SelectedItem.Name, Mode=OneWay}"Grid.Row="2"Grid.ColumnSpan="2" />
private Person selectedItem;

public Person SelectedItem
{
    get { returnthis.selectedItem; }
    set
    {
        if (this.selectedItem == value) { return; }
        this.selectedItem = value;
        this.PropertyChanged?.Invoke(this, SelectedItemPropertyChangedEventArgs);
    }
}
コンパイルエラーの内容は以下のようになります。
無効なバインド パス 'ViewModel.SelectedItem' : コンバーターを使用せずに型 'CollectionBinding.Person' を 'System.Object' にバインドできません
つまりSelectedItemがobject型なのに対してSelectedItemがPerson型なのでそのままだと代入できないといわれてるのです。でもSelectedItemは今回の場合はPerson型であることは確実なので代入してほしいところですよね。
愚痴っても仕方ないので解決策です。何もしないConverterを作っておくというのが解決策になります。
using System;
using Windows.UI.Xaml.Data;

namespace CollectionBinding
{
    publicclass NoopConverter : IValueConverter
    {
        publicobject Convert(objectvalue, Type targetType, object parameter, string language)
        {
            returnvalue;
        }

        publicobject ConvertBack(objectvalue, Type targetType, object parameter, string language)
        {
            returnvalue;
        }
    }
}
そして、これをConverterに指定します。
<Page.Resources><local:NoopConverter x:Key="NoopConverter" /></Page.Resources><ListBox ItemsSource="{x:Bind ViewModel.People}"SelectedItem="{x:Bind ViewModel.SelectedItem, Mode=TwoWay, Converter={StaticResource NoopConverter}}"Grid.Row="1"Grid.Column="1"><ListBox.ItemTemplate><DataTemplate><local:PersonView /></DataTemplate></ListBox.ItemTemplate></ListBox>
ConverterはPageのResourcesかApp.xamlのResourcesあたりからとれるように定義する必要があります。
これで実行するとちゃんとコンパイルが通るようになります。
その他
ここでは紹介していませんが、x:Bindでは、以下のようなプロパティが指定できます。
- TargetNullValue: nullの時にかわりに表示する値
- FallbackValue: 失敗したときの表示する値
まとめ
x:Bindでは、できることが通常のBindingに比べて少ないですが、使える場所では使うようにするとか、x:Bindで解決できるようにアプリを見直すことでパフォーマンスの向上が見込めます。
最後に、ここで書いたプログラムは以下のGitHubのリポジトリからダウンロードできます。