はじめに
react-nativeがWindowsでも動いた(Androidだけ)ので、試しにTypeScriptで書いてみたいとおもいます。
プロジェクトの作成
以下のコマンドを打ち込んでプロジェクトのひな型を作成します。
react-native init ReactNativeTypeScript
Visual Studioで開く
とりあえずVisual Studioで編集したいですよね?ということで、Visual Studioで開きます。 まず、From Existing Node.js codeでプロジェクトを作ります。 プロジェクト名はReactNativeTypeScriptで。
ウィザードが立ち上がるので、ReactNativeTypeScriptフォルダを選択してNextを押します。
プロジェクトの場所をReactNativeTypeScriptフォルダに設定してFinishを押します。
androidフォルダやiOSフォルダ以下をいったんプロじぇくtおから除外して再度プロジェクトに含めます。(必要なファイルが取り込まれてないので)
TypeScriptの設定を出すために、適当にTypeScriptのファイルを作って削除します。 プロジェクトのプロパティからTypeScriptビルドを選んでTSXファイルでのJSXコンパイルを応答に変更して保存します。
型定義ファイル
tsd install react-native
と打ち込んで型定義ファイルを取り込みます。プロジェクトにも含めておきます。そのままだと型定義間違ってるっぽいので、最後のほうを以下の内容から
declare module "react-native"{import ReactNative = __React
    exportdefault ReactNative
}

declare var global: __React.GlobalStatic

declare function require( name: string ): any


//TODO: BGR: this is a left-over from the initial port. Not sure it makes any sense
declare module "Dimensions"{import React from 'react-native';

    interface Dimensions {
        get( what: string ): React.ScaledSize;
    }var ExportDimensions: Dimensions;
    export = ExportDimensions;
}
以下の内容に書き換えます
declare module "react-native"{import ReactNative = __React
    export = ReactNative
}

declare var global: __React.GlobalStatic

declare function require( name: string ): any


//TODO: BGR: this is a left-over from the initial port. Not sure it makes any sense
declare module "Dimensions"{import * as React from 'react-native';

    interface Dimensions {
        get( what: string ): React.ScaledSize;
    }var ExportDimensions: Dimensions;
    export = ExportDimensions;
}
tsxファイルの作成
index.android.tsxという名前でTypeScriptファイルを作成します。 なぜかBuild ActionがContentに設定されるのでTypeScriptCompileに変更しておきます。もともとあるindex.android.jsは削除しておきます。
そして、コードを以下のように記述します。元あったファイルをTypeScript JSXに焼き直した感じです。
import * as React from 'react-native';
var{AppRegistry, StyleSheet, View, Text} = React;
var styles = StyleSheet.create({
    container: {
        flex: 1,
        justifyContent: 'center',
        alignItems: 'center',
        backgroundColor: '#F5FCFF'},
    welcome: {
        fontSize: 20,
        textAlign: 'center',
        margin: 10,
    },
    instructions: {
        textAlign: 'center',
        color: '#333333',
        marginBottom: 5,
    },
});

class HelloReactNative extends React.Component<{}, {}> {
    render() {return (
            <View style={styles.container}>
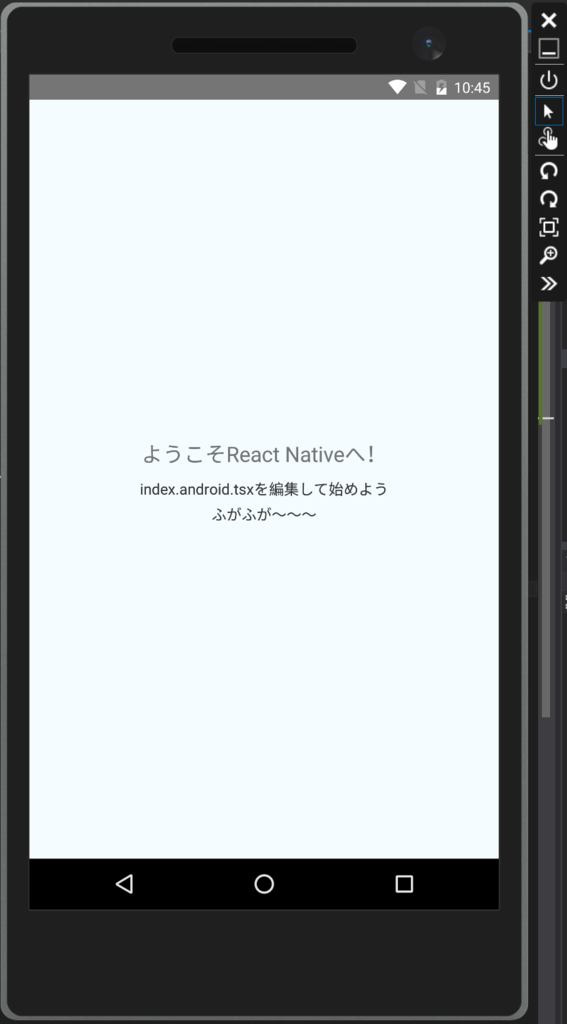
                <Text style={styles.welcome}>ようこそReact Nativeへ!</Text>
                <Text style={styles.instructions}>index.android.tsxを編集して始めよう</Text>
                <Text style={styles.instructions}>ふがふが~~~</Text>
            </View>
        );
    }}

AppRegistry.registerComponent('ReactNativeTypeScript', () => HelloReactNative);
実行して動作確認
まず、開発サーバーを起動します。
react-native start
Visual Studio Emulator for Androidを立ち上げて以下のコマンドを実行します。
react-native run-android
実行すると、こんな感じの画面が出てきます。TypeScriptでも行けますね。
