Office 2016しか入ってない環境にLync SDK 2013で作ったアプリもっていったら上記例外が出てしまいました。 具体的には以下で落ちる
LyncClient.GetDefault()
結果としてOffice 2013入れたら例外でなくなりました。 まじで…。
Office 2016しか入ってない環境にLync SDK 2013で作ったアプリもっていったら上記例外が出てしまいました。 具体的には以下で落ちる
LyncClient.GetDefault()
結果としてOffice 2013入れたら例外でなくなりました。 まじで…。
ApplicationのShutdownModeをOnMainWindowCloseに変更すればOKです。
<Application ...ShutdownMode="OnMainWindowClose">
    ...
</Application>
随分昔に書いてますね。
最近は事情も変わったので改めて書いてみようと思います。
Reactive ExtensionsをベースにしたMVVMの支援ライブラリです。
Xamarin.AndroidとXamarin.iOSとXamarin.Formsに対応しています!ここでは、Xamarin.Androidでの使い方を紹介したいと思います(Mac持ってない)。因みに、ここで紹介するのと同じ感覚でiOSアプリでも使えるので興味を持った人は試してみてください!
新規作成したときに作成されるカウントアップアプリをReactivePropertyを使って再現したみたいと思います。
Blank App(Android)を作成します。そして、NuGetからReactivePropertyを参照に追加します。
カウンターのクラスを作ります。普通のC#のクラスです。
using System.ComponentModel;

namespace CounterApp
{
    publicclass Counter : INotifyPropertyChanged
    {
        publicevent PropertyChangedEventHandler PropertyChanged;

        privateintvalue;

        publicint Value
        {
            get { returnthis.value; }
            privateset
            {
                this.value = value;
                this.PropertyChanged?.Invoke(this, new PropertyChangedEventArgs(nameof(this.Value)));
            }
        }

        publicvoid Increment()
        {
            this.Value++;
        }
    }
}
次にMainActivityのViewModelになるMainActivityViewModelクラスを作成します。
using Reactive.Bindings;
using Reactive.Bindings.Extensions;
using System;
using System.Linq;
using System.Reactive.Linq;

namespace CounterApp
{
    publicclass MainActivityViewModel
    {
        // Modelprivate Counter Model { get; } = new Counter();

        // Viewへ公開するインターフェースpublic ReadOnlyReactiveProperty<string> CounterValue { get; }

        public ReactiveCommand IncremantCommand { get; }

        public MainActivityViewModel()
        {
            // Counter.Valueを監視して文字列化this.CounterValue = this.Model
                .ObserveProperty(x => x.Value)
                .Select(x => x.ToString())
                .ToReadOnlyReactiveProperty();

            // インクリメントするコマンドthis.IncremantCommand = new ReactiveCommand();
            this.IncremantCommand.Subscribe(_ => this.Model.Increment());
        }
    }
}
ここまでは、普通のC#とReactivePropertyを使ったプログラミングです。
次にMainActivityに行きます。ReactivePropertyではAndroidのViewとバインドするための拡張メソッドとしてSetBindingというメソッドを提供しています。これを使うとコントロールのプロパティとReactivePropertyをバインドすることが出来ます。
また、コントロールのイベントをIObservableに変換したあとSetCommand拡張メソッドでコマンドを設定することで、コントロールのイベントとCommandを紐づけることが出来ます。
コードを書いてみましょう。
using Android.App;
using Android.OS;
using Android.Widget;
using Reactive.Bindings;
using System.Reactive.Linq;

namespace CounterApp
{
    [Activity(Label = "CounterApp", MainLauncher = true, Icon = "@drawable/icon")]
    publicclass MainActivity : Activity
    {
        private MainActivityViewModel ViewModel { get; } = new MainActivityViewModel();

        protectedoverridevoid OnCreate(Bundle bundle)
        {
            base.OnCreate(bundle);

            // Set our view from the "main" layout resource
            SetContentView(Resource.Layout.Main);

            // Get our button from the layout resource,// and attach an event to it
            var button = FindViewById<Button>(Resource.Id.MyButton);

            // ButtonのTextとバインド
            button.SetBinding(
                x => x.Text,
                this.ViewModel.CounterValue);

            // ButtonのClickイベントとバインド
            Observable.FromEventPattern(button, nameof(Button.Click))
                .SetCommand(this.ViewModel.IncremantCommand);
        }
    }
}
axmlに書いてバインドはできないのでごめんなさい。でもコードでも割と直感的に書けるかなと思ってます。
以下のようになります。

因みに公式でしっかり書いてるのはこちら。 コレクションのバインドもサポートしています。
ちゃんとXamarin.Formsでも使えるよっていうことで!
以下のを参考になおしましょう。
Go to the properties of the Android project, hit tab “Android options”, and unselect “Use Fast Deployment”.
プロジェクトのプロパティを開く
Hyper-Vマネージャーを開く
今ソケット通信がアツイ!!
というわけで、バックグラウンドでソケット通信をする方法です。
UWPのソケットのクラスであるStreamSocketクラスはバックグラウンドでソケット通信をする機能があったりします。
仮にRuntimeComponent1.SocketBackgroundTaskというバックグラウンドタスクがあるとして、ソケット通信をバックグラウンドに回すにか以下のようなコードになります。
private StreamSocket Socket { get; set; }

private IBackgroundTaskRegistration Task { get; set; }


private async void button_Click(object sender, RoutedEventArgs e)
{
    this.Task = BackgroundTaskRegistration.AllTasks
        .FirstOrDefault(x => x.Value.Name == "SocketTask")
        .Value;

    if (this.Task == null)
    {
        var builder = new BackgroundTaskBuilder();
        builder.Name = "SocketTask";
        builder.TaskEntryPoint = "RuntimeComponent1.SocketBackgroundTask";
        builder.IsNetworkRequested = true;
        builder.SetTrigger(new SocketActivityTrigger());
        this.Task = builder.Register();
    }

    var socketActivityInformation = default(SocketActivityInformation);
    if (!SocketActivityInformation.AllSockets.TryGetValue("MySocket", out socketActivityInformation))
    {
        this.Socket = new StreamSocket();
        await this.Socket.ConnectAsync(new HostName("127.0.0.1"), "9999");
        this.Socket.EnableTransferOwnership(this.Task.TaskId, SocketActivityConnectedStandbyAction.Wake);
        this.Socket.TransferOwnership("MySocket");
    }
}
そして、バックグラウンドタスクではSocketActivityTriggerDetailsを受け取って処理をします。
using ClassLibrary1;
using System.IO;
using Windows.ApplicationModel.Background;
using Windows.Networking.Sockets;

namespace RuntimeComponent1
{
    public sealed class SocketBackgroundTask : IBackgroundTask
    {
        public async void Run(IBackgroundTaskInstance taskInstance)
        {
            var d = taskInstance.GetDeferral();

            try
            {
                var detail = taskInstance.TriggerDetails as SocketActivityTriggerDetails;
                switch(detail.Reason)
                {
                    case SocketActivityTriggerReason.SocketActivity:
                        using (var sr = new StreamReader(detail.SocketInformation.StreamSocket.InputStream.AsStreamForRead()))
                        {
                            var data = sr.ReadLine();
                            Class1.AddOnDispatcher(data);
                        }
                        detail.SocketInformation.StreamSocket.TransferOwnership("MySocket");
                        break;
                    case SocketActivityTriggerReason.KeepAliveTimerExpired:
                        detail.SocketInformation.StreamSocket.TransferOwnership("MySocket");
                        break;
                }
            }
            catch
            { }

            d.Complete();
        }
    }
}
Package.appxmanifestの宣言には、システムイベントとしてバックグラウンドタスクに登録します。エントリポイントにクラス名を指定するのを忘れずに。
これだけで、バックグラウンドでソケット通信ができます。
これが出来たからといってアプリの方式どうしよう…Windowが出てるときはフォアグラウンドで通信しつつ最小化したらバックグラウンドに回してとか…バックグラウンドタスクとWindowの連携とかetc...
ビルドするとこんなエラーが出ます。
Download failed. Please download https://dl-ssl.google.com/android/repository/android_m2repository_r25.zip and put it to the C:\Users\<username>\AppData\Local\Xamarin\Android.Support.Design\23.1.1.0 directory.
言われた通りandroid_m2repository_r25.zipをDLしてきてフォルダにおいてもだめ。展開しておいてもだめ。 どうしたらいいんだろう。
CountNotifierを使うケースで。CountNotifierは、カウントを数えるものですが、Emptyの時だけというようにSelectかましてToReactiveCommandすると、多重実行防止にも使えます。こんな感じで。
publicclass MainWindowViewModel
{
    private CountNotifier ProcessCounter { get; } = new CountNotifier();

    public ReactiveCommand ExecuteCommand { get; }

    public ReactiveProperty<string> Output { get; }

    public MainWindowViewModel()
    {
        this.ExecuteCommand =
            this.ProcessCounter
                .Select(x => x == CountChangedStatus.Empty)
                .ToReactiveCommand();
        this.Output = this.ExecuteCommand
            .SelectMany(
                Observable.Using(
                    () => this.ProcessCounter.Increment(),
                    _ => this.HeavyTaskAsObservable()))
            .Select(x => x.ToString())
            .ToReactiveProperty();
    }

    // なんか重い処理public IObservable<DateTime> HeavyTaskAsObservable()
    {
        return Observable.Return(DateTime.Now).Delay(TimeSpan.FromSeconds(5));
    }
}
もうちょっと単純に書くとこういう風になるかな。
publicclass MainWindowViewModel
{
    private CountNotifier ProcessCounter { get; } = new CountNotifier();

    public ReactiveCommand ExecuteCommand { get; }

    public ReactiveProperty<string> Output { get; } = new ReactiveProperty<string>();

    public MainWindowViewModel()
    {
        this.ExecuteCommand =
            this.ProcessCounter
                .Select(x => x == CountChangedStatus.Empty)
                .ToReactiveCommand();

        this.ExecuteCommand.Subscribe(async _ =>
        {
            using (this.ProcessCounter.Increment())
            {
                this.Output.Value = (await this.HeavyTaskAsync()).ToString();
            }
        });
    }

    // なんか重い処理public async Task<DateTime> HeavyTaskAsync()
    {
        await Task.Delay(5000);
        return DateTime.Now;
    }
}
多重起動防止用のクラスがあってもいいかもしれないですね。
ということがしたいとします。
ListViewItemのDataContextは、項目の要素になってるのでひと手間必要になります。
こんな感じのViewModelがあるとして。
publicsealedpartialclass MainPage : Page
{
    public MainPageViewModel ViewModel => this.DataContext as MainPageViewModel;

    public MainPage()
    {
        this.InitializeComponent();
    }
}

publicclass MainPageViewModel : BindableBase
{
    public ObservableCollection<ItemViewModel> Items { get; } = new ObservableCollection<ItemViewModel>
    {
        new ItemViewModel { Value = "Item1" },
        new ItemViewModel { Value = "Item2" },
        new ItemViewModel { Value = "Item3" },
    };

    publicvoid Alert()
    {
        Debug.WriteLine("Alert");
    }
}

publicclass ItemViewModel : BindableBase
{
    privatestringvalue;

    publicstring Value
    {
        get { returnthis.value; }
        set { this.SetProperty(refthis.value, value); }
    }

}
こんな風に書きます。ElementNameでPageを指定してるのがポイントですね。
<Page xmlns="http://schemas.microsoft.com/winfx/2006/xaml/presentation"xmlns:x="http://schemas.microsoft.com/winfx/2006/xaml"xmlns:local="using:App9"xmlns:d="http://schemas.microsoft.com/expression/blend/2008"xmlns:mc="http://schemas.openxmlformats.org/markup-compatibility/2006"xmlns:Interactivity="using:Microsoft.Xaml.Interactivity"xmlns:Core="using:Microsoft.Xaml.Interactions.Core"x:Class="App9.MainPage"mc:Ignorable="d"x:Name="Root"><Page.DataContext><local:MainPageViewModel /></Page.DataContext><Grid Background="{ThemeResource ApplicationPageBackgroundThemeBrush}"><ListView ItemsSource="{x:Bind ViewModel.Items}"><ListView.ItemTemplate><DataTemplate x:DataType="local:ItemViewModel"><StackPanel><TextBlock Text="{x:Bind Value}" /><Button Content="OKOK"><Interactivity:Interaction.Behaviors><Core:EventTriggerBehavior EventName="Click"><Core:CallMethodAction TargetObject="{Binding ElementName=Root, Path=DataContext}"MethodName="Alert" /></Core:EventTriggerBehavior></Interactivity:Interaction.Behaviors></Button></StackPanel></DataTemplate></ListView.ItemTemplate></ListView></Grid></Page>
続きです。
senderのDataContextを引数に渡してくれるようなCallMethodActionを自作すればいいですね。
using Microsoft.Xaml.Interactivity;
using System.Reflection;
using Windows.UI.Xaml;

namespace App9
{
    publicclass TransferSenderDataContextCallMethodAction : DependencyObject, IAction
    {
        publicobject TargetObject
        {
            get { return (object)GetValue(TargetObjectProperty); }
            set { SetValue(TargetObjectProperty, value); }
        }

        // Using a DependencyProperty as the backing store for TargetObject.  This enables animation, styling, binding, etc...publicstaticreadonly DependencyProperty TargetObjectProperty =
            DependencyProperty.Register("TargetObject", typeof(object), typeof(TransferSenderDataContextCallMethodAction), new PropertyMetadata(null));

        publicstring MethodName
        {
            get { return (string)GetValue(MethodNameProperty); }
            set { SetValue(MethodNameProperty, value); }
        }

        // Using a DependencyProperty as the backing store for MethodName.  This enables animation, styling, binding, etc...publicstaticreadonly DependencyProperty MethodNameProperty =
            DependencyProperty.Register("MethodName", typeof(string), typeof(TransferSenderDataContextCallMethodAction), new PropertyMetadata(null));


        publicobject Execute(object sender, object parameter)
        {
            if (this.TargetObject == null || this.MethodName == null)
            {
                returnnull;
            }

            var methodInfo = this.TargetObject.GetType().GetTypeInfo().GetDeclaredMethod(this.MethodName);
            return methodInfo.Invoke(this.TargetObject, newobject[] { (sender as FrameworkElement)?.DataContext });
        }
    }
}
こいつはこんな感じで使う。
<Page xmlns="http://schemas.microsoft.com/winfx/2006/xaml/presentation"xmlns:x="http://schemas.microsoft.com/winfx/2006/xaml"xmlns:local="using:App9"xmlns:d="http://schemas.microsoft.com/expression/blend/2008"xmlns:mc="http://schemas.openxmlformats.org/markup-compatibility/2006"xmlns:Interactivity="using:Microsoft.Xaml.Interactivity"xmlns:Core="using:Microsoft.Xaml.Interactions.Core"x:Class="App9.MainPage"mc:Ignorable="d"x:Name="Root"><Page.DataContext><local:MainPageViewModel /></Page.DataContext><Grid Background="{ThemeResource ApplicationPageBackgroundThemeBrush}"><ListView ItemsSource="{x:Bind ViewModel.Items}"><ListView.ItemTemplate><DataTemplate x:DataType="local:ItemViewModel"><StackPanel><TextBlock Text="{x:Bind Value}" /><Button Content="OKOK"><Interactivity:Interaction.Behaviors><Core:EventTriggerBehavior EventName="Click"><local:TransferSenderDataContextCallMethodAction TargetObject="{Binding ElementName=Root, Path=DataContext}"MethodName="Alert" /></Core:EventTriggerBehavior></Interactivity:Interaction.Behaviors></Button></StackPanel></DataTemplate></ListView.ItemTemplate></ListView></Grid></Page>
VMのメソッドは引数を増やしておきましょう。
using Prism.Mvvm;
using System;
using System.Collections.Generic;
using System.Collections.ObjectModel;
using System.Diagnostics;
using System.IO;
using System.Linq;
using System.Runtime.InteropServices.WindowsRuntime;
using Windows.Foundation;
using Windows.Foundation.Collections;
using Windows.UI.Xaml;
using Windows.UI.Xaml.Controls;
using Windows.UI.Xaml.Controls.Primitives;
using Windows.UI.Xaml.Data;
using Windows.UI.Xaml.Input;
using Windows.UI.Xaml.Media;
using Windows.UI.Xaml.Navigation;

// 空白ページのアイテム テンプレートについては、http://go.microsoft.com/fwlink/?LinkId=402352&clcid=0x409 を参照してくださいnamespace App9
{
    /// <summary>/// それ自体で使用できる空白ページまたはフレーム内に移動できる空白ページ。/// </summary>publicsealedpartialclass MainPage : Page
    {
        public MainPageViewModel ViewModel => this.DataContext as MainPageViewModel;

        public MainPage()
        {
            this.InitializeComponent();
        }
    }

    publicclass MainPageViewModel : BindableBase
    {
        public ObservableCollection<ItemViewModel> Items { get; } = new ObservableCollection<ItemViewModel>
        {
            new ItemViewModel { Value = "Item1" },
            new ItemViewModel { Value = "Item2" },
            new ItemViewModel { Value = "Item3" },
        };

        publicvoid Alert(ItemViewModel item)
        {
            Debug.WriteLine($"Alert {item.Value}");
        }
    }

    publicclass ItemViewModel : BindableBase
    {
        privatestringvalue;

        publicstring Value
        {
            get { returnthis.value; }
            set { this.SetProperty(refthis.value, value); }
        }

    }
}
初音さんがコマンドの場合のを教えてくれました。InvokeCommandActionを使えばこういう感じでいけます。
VMをコマンドに変更して
using Prism.Commands;
using Prism.Mvvm;
using System;
using System.Collections.Generic;
using System.Collections.ObjectModel;
using System.Diagnostics;
using System.IO;
using System.Linq;
using System.Runtime.InteropServices.WindowsRuntime;
using Windows.Foundation;
using Windows.Foundation.Collections;
using Windows.UI.Xaml;
using Windows.UI.Xaml.Controls;
using Windows.UI.Xaml.Controls.Primitives;
using Windows.UI.Xaml.Data;
using Windows.UI.Xaml.Input;
using Windows.UI.Xaml.Media;
using Windows.UI.Xaml.Navigation;

// 空白ページのアイテム テンプレートについては、http://go.microsoft.com/fwlink/?LinkId=402352&clcid=0x409 を参照してくださいnamespace App9
{
    /// <summary>/// それ自体で使用できる空白ページまたはフレーム内に移動できる空白ページ。/// </summary>publicsealedpartialclass MainPage : Page
    {
        public MainPageViewModel ViewModel => this.DataContext as MainPageViewModel;

        public MainPage()
        {
            this.InitializeComponent();
        }
    }

    publicclass MainPageViewModel : BindableBase
    {
        public ObservableCollection<ItemViewModel> Items { get; } = new ObservableCollection<ItemViewModel>
        {
            new ItemViewModel { Value = "Item1" },
            new ItemViewModel { Value = "Item2" },
            new ItemViewModel { Value = "Item3" },
        };

        public DelegateCommand<ItemViewModel> AlertCommand { get; } = new DelegateCommand<ItemViewModel>(x =>
        {
            Debug.WriteLine($"Alert {x.Value}");
        });
    }

    publicclass ItemViewModel : BindableBase
    {
        privatestringvalue;

        publicstring Value
        {
            get { returnthis.value; }
            set { this.SetProperty(refthis.value, value); }
        }

    }
}
そして、InvokeCommandActionでこう指定すればOKです。
<Page xmlns="http://schemas.microsoft.com/winfx/2006/xaml/presentation"xmlns:x="http://schemas.microsoft.com/winfx/2006/xaml"xmlns:local="using:App9"xmlns:d="http://schemas.microsoft.com/expression/blend/2008"xmlns:mc="http://schemas.openxmlformats.org/markup-compatibility/2006"xmlns:Interactivity="using:Microsoft.Xaml.Interactivity"xmlns:Core="using:Microsoft.Xaml.Interactions.Core"x:Class="App9.MainPage"mc:Ignorable="d"x:Name="Root"><Page.DataContext><local:MainPageViewModel /></Page.DataContext><Grid Background="{ThemeResource ApplicationPageBackgroundThemeBrush}"><ListView ItemsSource="{x:Bind ViewModel.Items}"><ListView.ItemTemplate><DataTemplate x:DataType="local:ItemViewModel"><StackPanel><TextBlock Text="{x:Bind Value}" /><Button Content="OKOK"><Interactivity:Interaction.Behaviors><Core:EventTriggerBehavior EventName="Click"><Core:InvokeCommandAction Command="{Binding ElementName=Root, Path=DataContext.AlertCommand}"CommandParameter="{Binding}" /></Core:EventTriggerBehavior></Interactivity:Interaction.Behaviors></Button></StackPanel></DataTemplate></ListView.ItemTemplate></ListView></Grid></Page>
CommandParameterにBindingすればOKですね。確かに。
そんなときはAppクラスのResumingイベントで処理を行います。
無い。

ということで、年始に365記事以上書くという目標を立ててるのですが、とりあえず100日という1つの区切りを迎えることが出来ました。1日1記事書けば達成じゃない?という思惑で始めたのですが、1日1記事以上のペースで書き続けているっぽく、かなり貯金がたまってるので、これ以降は無理して連続して書かないかもしれない?200日目はあるのかどうか。
2度押し防止のための機能を追加しました。
名前はBusyNotifierです。
こんな感じで使います。
publicclass MainWindowViewModel
{
    private BusyNotifier BusyNotifier { get; } = new BusyNotifier();

    public ReactiveProperty<string> Output { get; } = new ReactiveProperty<string>();

    public ReactiveCommand ExecuteCommand { get; }

    public MainWindowViewModel()
    {
        this.ExecuteCommand = this.BusyNotifier
            .Select(x => !x)
            .ToReactiveCommand();

        this.ExecuteCommand.Subscribe(async _ =>
        {
            if (this.BusyNotifier.IsBusy) { return; }
            using (this.BusyNotifier.ProcessStart())
            {
                var result = await this.HeavyTaskAsync();
                this.Output.Value = result.ToString();
            }
        });
    }

    public async Task<DateTime> HeavyTaskAsync()
    {
        await Task.Delay(5000);
        return DateTime.Now;
    }
}
こんな意見をいただいたので
@okazuki BusyNotifier から IsNotBusy(IsReady?) as ReactiveProperty が得られると嬉しいですね。理由はこれ→ https://t.co/SjGC0SHtzuです。
— あめいスピナーデコ (@amay077) 2016年4月8日
ちょっと機能を追加しました
boolのIObservableに対して、値を反転するInverse拡張メソッドを追加しました。これでこういう風に処理が書けるようになります。
var b = new BusyNotifier();
var isIdle = b.Inverse().ToReadOnlyReactiveProperty(); // 処理OKなとき用
本質的にSelect(x => !x)と変わらないですが、意図を伝えやすくなってますね。
UWPのバックグラウンドタスクとフォアグラウンドの処理を連携させるために、IBackgroundTaskRegistrationのProgressイベントとCompletedイベントが定義されています。
例えば、TimerTaskという名前のバックグラウンドタスクのProgressイベントとCompletedイベントを購読するには以下のようになります。
using System;
using System.Linq;
using Windows.ApplicationModel.Background;
using Windows.Storage;
using Windows.UI.Xaml.Controls;
using Windows.UI.Xaml.Navigation;

// 空白ページのアイテム テンプレートについては、http://go.microsoft.com/fwlink/?LinkId=402352&clcid=0x409 を参照してくださいnamespace App10
{
    /// <summary>/// それ自体で使用できる空白ページまたはフレーム内に移動できる空白ページ。/// </summary>publicsealedpartialclass MainPage : Page
    {
        public MainPage()
        {
            this.InitializeComponent();
        }

        protectedoverridevoid OnNavigatedTo(NavigationEventArgs e)
        {
            base.OnNavigatedTo(e);

            var task = BackgroundTaskRegistration.AllTasks
                .First(x => x.Value.Name == "TimerTask")
                .Value;
            task.Progress += this.Task_Progress;
            task.Completed += this.Task_Completed;
        }

        private async void Task_Progress(BackgroundTaskRegistration sender, BackgroundTaskProgressEventArgs args)
        {
            await this.Dispatcher.RunAsync(Windows.UI.Core.CoreDispatcherPriority.Normal, () =>
            {
                this.TextBlock.Text = $"{args.Progress}%";
            });
        }

        private async void Task_Completed(BackgroundTaskRegistration sender, BackgroundTaskCompletedEventArgs args)
        {
            await this.Dispatcher.RunAsync(Windows.UI.Core.CoreDispatcherPriority.Normal, () =>
            {
                this.TextBlock.Text = (string)ApplicationData.Current.LocalSettings.Values["TimerTask"];
            });
        }
    }
}
画面にTextBlockという名前のTextBlockを置いている前提のコードになります。ProgressイベントではそのままProgressの状態を表示して、CompletedではApplicationData.Current.LocalSettingsを経由してバックグラウンドタスクからのデータを表示しています。
バックグラウンドタスク側は以下のような実装になっています。
using System;
using Windows.ApplicationModel.Background;
using Windows.Storage;
using Windows.System.Threading;

namespace RuntimeComponent1
{
    publicsealedclass TimerTask : IBackgroundTask
    {
        private BackgroundTaskDeferral Deferral { get; set; }
        privateuint Progress { get; set; }
        publicvoid Run(IBackgroundTaskInstance taskInstance)
        {
            this.Deferral = taskInstance.GetDeferral();
            ThreadPoolTimer.CreatePeriodicTimer(timer =>
            {
                if (this.Progress == 100)
                {
                    this.Deferral.Complete();
                    timer.Cancel();
                    ApplicationData.Current.LocalSettings.Values["TimerTask"] = DateTime.Now.ToString();
                    return;
                }

                taskInstance.Progress = this.Progress;
                this.Progress += 10;
            }, TimeSpan.FromSeconds(1));
        }
    }
}
タイマーでカウントアップして最後にApplicationData.Current.LocalSettingsにデータを書き込んで終了しています。
バックグラウンドタスクの登録はApp.xaml.csのOnLaunchedメソッドで以下のコードを実行しています。
foreach (var t in BackgroundTaskRegistration.AllTasks)
{
    t.Value.Unregister(true);
}
var task = BackgroundTaskRegistration.AllTasks
    .FirstOrDefault(x => x.Value.Name == "TimerTask")
    .Value;
if (task == null)
{
    var tb = new BackgroundTaskBuilder();
    tb.Name = "TimerTask";
    tb.TaskEntryPoint = "RuntimeComponent1.TimerTask";
    tb.SetTrigger(new TimeTrigger(15, false));
    task = tb.Register();
}
Package.appxmanifestへタイマーとしてバックグラウンドタスクの宣言を追加するのを忘れずに。
デバッグの場所のライフサイクルイベントから、バックグラウンドタスクのキックが出来ます。

JObjectの使い方を勉強してみた。
var j = new JObject();
j.Add("Item1", new JObject());
j.Add("Item2", new JObject());
j.Add("Item3", new JObject());
こういう感じで
Console.WriteLine(JsonConvert.SerializeObject(j));
とすることで
{
  "Item1": {},
  "Item2": {},
  "Item3": {}
}
みたいなJSONが作られる。
こうやって地道にJSONを組み立てることで、いけてないJSONに対しても対応できるくさい。
最適解じゃなさそうだけどこんな感じで…。
<Window x:Class="WpfApplication5.MainWindow"xmlns="http://schemas.microsoft.com/winfx/2006/xaml/presentation"xmlns:x="http://schemas.microsoft.com/winfx/2006/xaml"xmlns:d="http://schemas.microsoft.com/expression/blend/2008"xmlns:mc="http://schemas.openxmlformats.org/markup-compatibility/2006"xmlns:local="clr-namespace:WpfApplication5"mc:Ignorable="d"Title="MainWindow"Height="350"Width="525"><Grid><Grid.RowDefinitions><RowDefinition Height="Auto"/><RowDefinition /></Grid.RowDefinitions><Button Content="Dump"Click="ButtonDump_Click" /><ListBox x:Name="ListBox"Grid.Row="1"></ListBox></Grid></Window>
ContainerFromItemで要素がとれなかったらそもそも表示されてない。ContainerFromItemでインスタンスが取れたら、ListBoxからの相対座標がListBoxの矩形領域に収まってたら表示されてるみたいな。
using System.Diagnostics;
using System.Linq;
using System.Windows;
using System.Windows.Controls;
using System.Windows.Media;

namespace WpfApplication5
{
    /// <summary>/// MainWindow.xaml の相互作用ロジック/// </summary>publicpartialclass MainWindow : Window
    {
        public MainWindow()
        {
            InitializeComponent();
            this.ListBox.ItemsSource = Enumerable.Range(1, 20)
                .Select(x => new Person
                {
                    Name = $"tanaka {x}"
                })
                .ToArray();
        }

        privatevoid ButtonDump_Click(object sender, RoutedEventArgs e)
        {
            var box = VisualTreeHelper.GetDescendantBounds(this.ListBox);
            foreach (var item inthis.ListBox.ItemsSource.Cast<Person>())
            {
                var container = this.ListBox.ItemContainerGenerator.ContainerFromItem(item) as ListBoxItem;
                if (container == null)
                {
                    Debug.WriteLine($"表示されてない: {item.Name}");
                    continue;
                }

                var top = container.TranslatePoint(new Point(), this.ListBox);
                if (box.Contains(top))
                {
                    Debug.WriteLine($"表示されてる: {item.Name}");
                }
                else
                {
                    Debug.WriteLine($"表示されてない: {item.Name}");
                }
            }
        }
    }

    publicclass Person
    {
        publicstring Name { get; set; }

        publicoverridestring ToString()
        {
            returnthis.Name;
        }
    }
}
でも、Padding指定されたら破たんするかな…。
Prism使ってやってみましょう。UWPアプリを作ってPrism.Unityを追加してAppクラスを書き換えます。
XAML側
<Prism:PrismUnityApplication x:Class="App14.App"xmlns="http://schemas.microsoft.com/winfx/2006/xaml/presentation"xmlns:x="http://schemas.microsoft.com/winfx/2006/xaml"xmlns:local="using:App14"xmlns:Prism="using:Prism.Unity.Windows"RequestedTheme="Light"></Prism:PrismUnityApplication>
C#側
using App14.ViewModels;
using App14.Views;
using Microsoft.Practices.Unity;
using Prism.Unity.Windows;
using System.Diagnostics;
using System.Threading.Tasks;
using Windows.ApplicationModel.Activation;
using Windows.UI.Xaml;
using Windows.UI.Xaml.Controls;

namespace App14
{
    sealedpartialclass App : PrismUnityApplication
    {
        public App()
        {
            Microsoft.ApplicationInsights.WindowsAppInitializer.InitializeAsync(
                Microsoft.ApplicationInsights.WindowsCollectors.Metadata |
                Microsoft.ApplicationInsights.WindowsCollectors.Session);
            this.InitializeComponent();
        }

        protectedoverride Task OnLaunchApplicationAsync(LaunchActivatedEventArgs args)
        {
            this.NavigationService.Navigate("Main", null);
            return Task.CompletedTask;
        }
    }
}
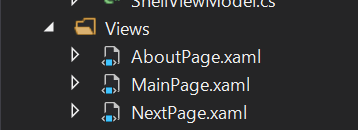
画面遷移テスト用に3つくらい画面を作ります。ViewsフォルダにMainPage.xaml、NextPage.xaml、AboutPage.xamlくらい作ります。

Shellっていう名前でSplitViewを持ったページを作ります。こいつは、SplitViewを持ったページです。
<Page x:Class="App14.Views.Shell"xmlns="http://schemas.microsoft.com/winfx/2006/xaml/presentation"xmlns:x="http://schemas.microsoft.com/winfx/2006/xaml"xmlns:local="using:App14.Views"xmlns:d="http://schemas.microsoft.com/expression/blend/2008"xmlns:mc="http://schemas.openxmlformats.org/markup-compatibility/2006"xmlns:Mvvm="using:Prism.Windows.Mvvm"Mvvm:ViewModelLocator.AutoWireViewModel="True"mc:Ignorable="d"><Grid Background="{ThemeResource ApplicationPageBackgroundThemeBrush}"><SplitView x:Name="FrameHost"x:FieldModifier="public"IsPaneOpen="True"DisplayMode="CompactInline"><SplitView.Pane><ListView ></ListView></SplitView.Pane></SplitView></Grid></Page>
ListViewにページ名を出して、右側にページを表示するようにします。PrismでSplitViewとかを持ったクラスを作るには、AppクラスのCreateShellメソッドをオーバーライドして渡されたFrameを使ってページを構築します。今回の場合SplitViewにFrameHostという名前を付けてるので、こいつのContentにFrameを突っ込みます。
protectedoverride UIElement CreateShell(Frame rootFrame)
{
    var shell = this.Container.Resolve<Shell>();
    shell.FrameHost.Content = rootFrame;
    return shell;
}
なんとなく下地ができたので、ページ遷移を管理するクラスを作ります。Prismで画面遷移するためのページ名を管理するクラスです。ページクラスからページ名への変換ロジックも持たせてあります。後で使います。
using Prism.Mvvm;
using System;
using System.Collections.ObjectModel;

namespace App14.ViewModels
{
    publicclass NavigationStateManager : BindableBase
    {
        public ObservableCollection<string> PageTokens { get; } = new ObservableCollection<string>();

        privatestring currentPageToken;

        publicstring CurrentPageToken
        {
            get { returnthis.currentPageToken; }
            set { this.SetProperty(refthis.currentPageToken, value); }
        }

        publicvoid SetCurrentPageTokenFromPageType(Type pageType)
        {
            var typeName = pageType.Name;
            this.CurrentPageToken = typeName.Substring(0, typeName.Length - 4);
        }
    }
}
こいつをUnityのコンテナにシングルトンで登録します。そして、FrameのNavigatedイベントで現在のページをセットするようにします。CurrentPageTokenが変わったら、そのページに画面遷移もするようにしておきましょう。ということでAppクラスが以下のように化けます。
using App14.ViewModels;
using App14.Views;
using Microsoft.Practices.Unity;
using Prism.Unity.Windows;
using System.Diagnostics;
using System.Threading.Tasks;
using Windows.ApplicationModel.Activation;
using Windows.UI.Xaml;
using Windows.UI.Xaml.Controls;

namespace App14
{
    sealedpartialclass App : PrismUnityApplication
    {
        public App()
        {
            Microsoft.ApplicationInsights.WindowsAppInitializer.InitializeAsync(
                Microsoft.ApplicationInsights.WindowsCollectors.Metadata |
                Microsoft.ApplicationInsights.WindowsCollectors.Session);
            this.InitializeComponent();
        }

        protectedoverridevoid ConfigureContainer()
        {
            base.ConfigureContainer();
            // NavigationStateManagerをシングルトンで管理してもらうthis.Container.RegisterType<NavigationStateManager>(new ContainerControlledLifetimeManager());
        }

        protectedoverride Frame OnCreateRootFrame()
        {
            // Frameをカスタマイズ
            var frame = new Frame();
            frame.Navigated += (_, e) =>
            {
                this.Container.Resolve<NavigationStateManager>().SetCurrentPageTokenFromPageType(e.SourcePageType);
            };
            return frame;
        }

        protectedoverride Task OnInitializeAsync(IActivatedEventArgs args)
        {
            // 初期化
            var navigationStateManager = this.Container.Resolve<NavigationStateManager>();
            navigationStateManager.PageTokens.Add("Main");
            navigationStateManager.PageTokens.Add("Next");
            navigationStateManager.PageTokens.Add("About");
            navigationStateManager.CurrentPageToken = "Main";

            // CurrentPageTokenが変わったら画面遷移するthis.Container.Resolve<NavigationStateManager>()
                .PropertyChanged += (sender, e) =>
                {
                    if (e.PropertyName == nameof(NavigationStateManager.CurrentPageToken))
                    {
                        this.NavigationService.Navigate(navigationStateManager.CurrentPageToken, null);
                    }
                };
            return Task.CompletedTask;
        }

        protectedoverride UIElement CreateShell(Frame rootFrame)
        {
            var shell = this.Container.Resolve<Shell>();
            shell.FrameHost.Content = rootFrame;
            return shell;
        }

        protectedoverride Task OnLaunchApplicationAsync(LaunchActivatedEventArgs args)
        {
            this.NavigationService.Navigate("Main", null);
            return Task.CompletedTask;
        }
    }
}
これで、NavigationStateManagerの状態に同期して画面遷移するようになりました。あとは、NavigationStateManagerをSplitViewの左側のListViewにバインドするだけです。ShellViewModelクラスを作って、以下のようにNavigationStateManagerを受け取って外部に公開しましょう。
using Prism.Windows.Mvvm;

namespace App14.ViewModels
{
    publicclass ShellViewModel : ViewModelBase
    {
        public NavigationStateManager NavigationStateManager { get; }

        public ShellViewModel(NavigationStateManager navigationStateManager)
        {
            this.NavigationStateManager = navigationStateManager;
        }

    }
}
そして、Shell.xamlでListViewにバインドします。バインドするのは、PageTokensプロパティとCurrentPageTokenプロパティになります。
<Page x:Class="App14.Views.Shell"xmlns="http://schemas.microsoft.com/winfx/2006/xaml/presentation"xmlns:x="http://schemas.microsoft.com/winfx/2006/xaml"xmlns:local="using:App14.Views"xmlns:d="http://schemas.microsoft.com/expression/blend/2008"xmlns:mc="http://schemas.openxmlformats.org/markup-compatibility/2006"xmlns:Mvvm="using:Prism.Windows.Mvvm"Mvvm:ViewModelLocator.AutoWireViewModel="True"mc:Ignorable="d"><Grid Background="{ThemeResource ApplicationPageBackgroundThemeBrush}"><SplitView x:Name="FrameHost"x:FieldModifier="public"IsPaneOpen="True"DisplayMode="CompactInline"><SplitView.Pane><ListView ItemsSource="{x:Bind ViewModel.NavigationStateManager.PageTokens}"SelectedItem="{x:Bind ViewModel.NavigationStateManager.CurrentPageToken, Mode=TwoWay}"></ListView></SplitView.Pane></SplitView></Grid></Page>
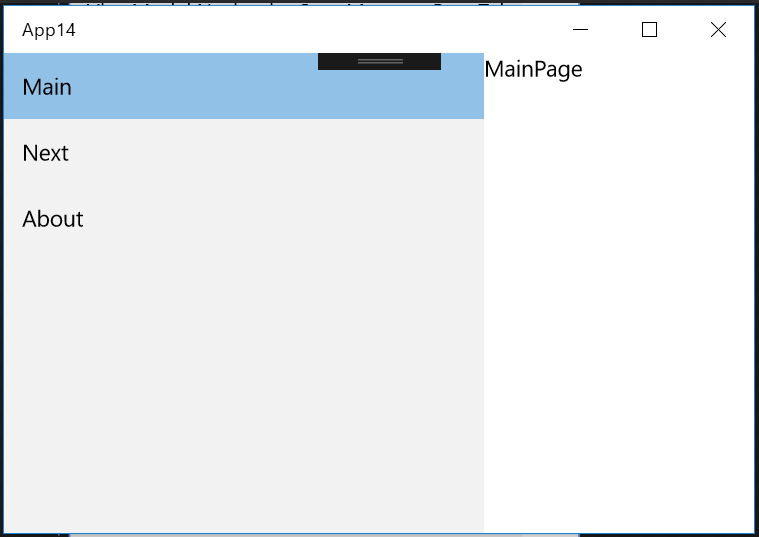
実行すると以下のようになります。初期状態ではMainPageが表示されてます。左側のListViewの選択もMainになってるのが確認できます。

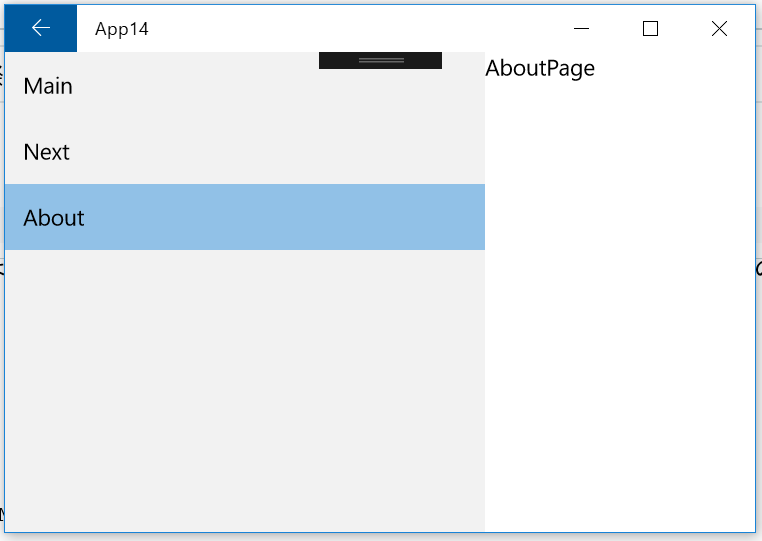
ListViewを操作すると、画面遷移していくことが確認できます。下図は、Aboutをクリックしたときの様子です。

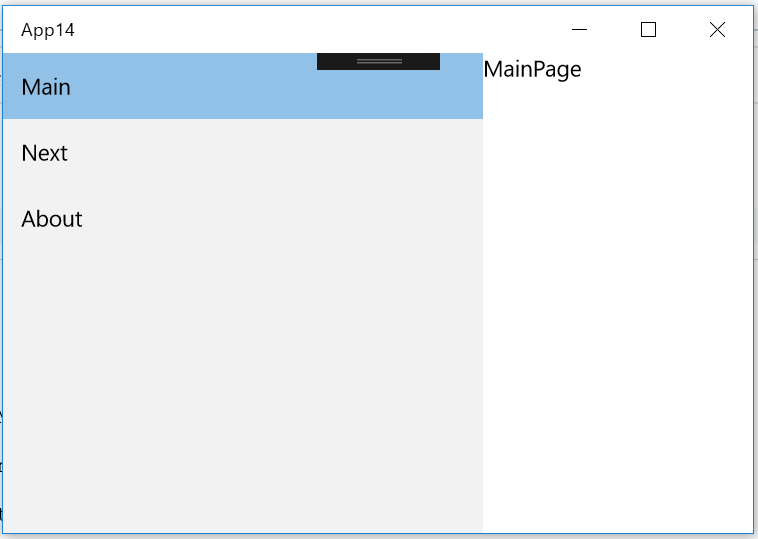
戻るボタンを押すときちんとページが戻ってListViewの選択も同期してることが確認できます。

ということで、SplitViewの左側のページのリストと実際に右側に表示されてるページの同期をとってみました。管理クラスを作って、ページの状態をそれと同期させるというアプローチです。もうちょっと複雑な要件になってくると、もうちょっと賢く作らないといけないかもしれないですね。(ページのパラメータ渡すとかetc...)
デフォルト値を指定すればいいみたいです。メモメモ。
// hogeは必須で残りはオプションpublic IHttpActionResult Get(string hoge, string foo = null, string bar = null)
{
   ...
}
PrismのWPFとXamarin.Forms(こっちはまだPreview)には、プロジェクトテンプレートが提供されています。 拡張機能でPrismで検索すると、Prism Template Packというものがヒットします。

こいつをインストールすると、Prism.Unityを使ったプロジェクトテンプレートと、モジュールのプロジェクトテンプレートが追加されます。

こいつを新規作成すると以下のような感じのファイルが作られます。

PrismでWPFアプリ作るのにめんどくさいとっかかりが楽になるので大分助かりますね。