Azure Pipeline についてちょっと見てみましょう。最近は、YAML で書けるので雰囲気としては GitHub Actions と同じ感じでいけます。というか同じチームで作ってるみたいなので、当然ですよね。
というわけで Pipeline を作っていきます。まずはハローワールドから。Azure Pipeline の画面を開くと最初は何もないのでパイプライン作らないか?って聞かれます。こんな感じで
![f:id:okazuki:20200223180239p:plain f:id:okazuki:20200223180239p:plain]()
次にリポジトリーを選択するような画面になるのでお好みのリポジトリーを選択。このリポジトリーがデフォルトで clone されてきます。
そうすると、いきなりこんな感じの YAML が生成されます。
trigger:- master
pool:vmImage:'ubuntu-latest'steps:- script: echo Hello, world!
displayName:'Run a one-line script'- script: |
echo Add other tasks to build, test, and deploy your project.
echo See https://aka.ms/yaml
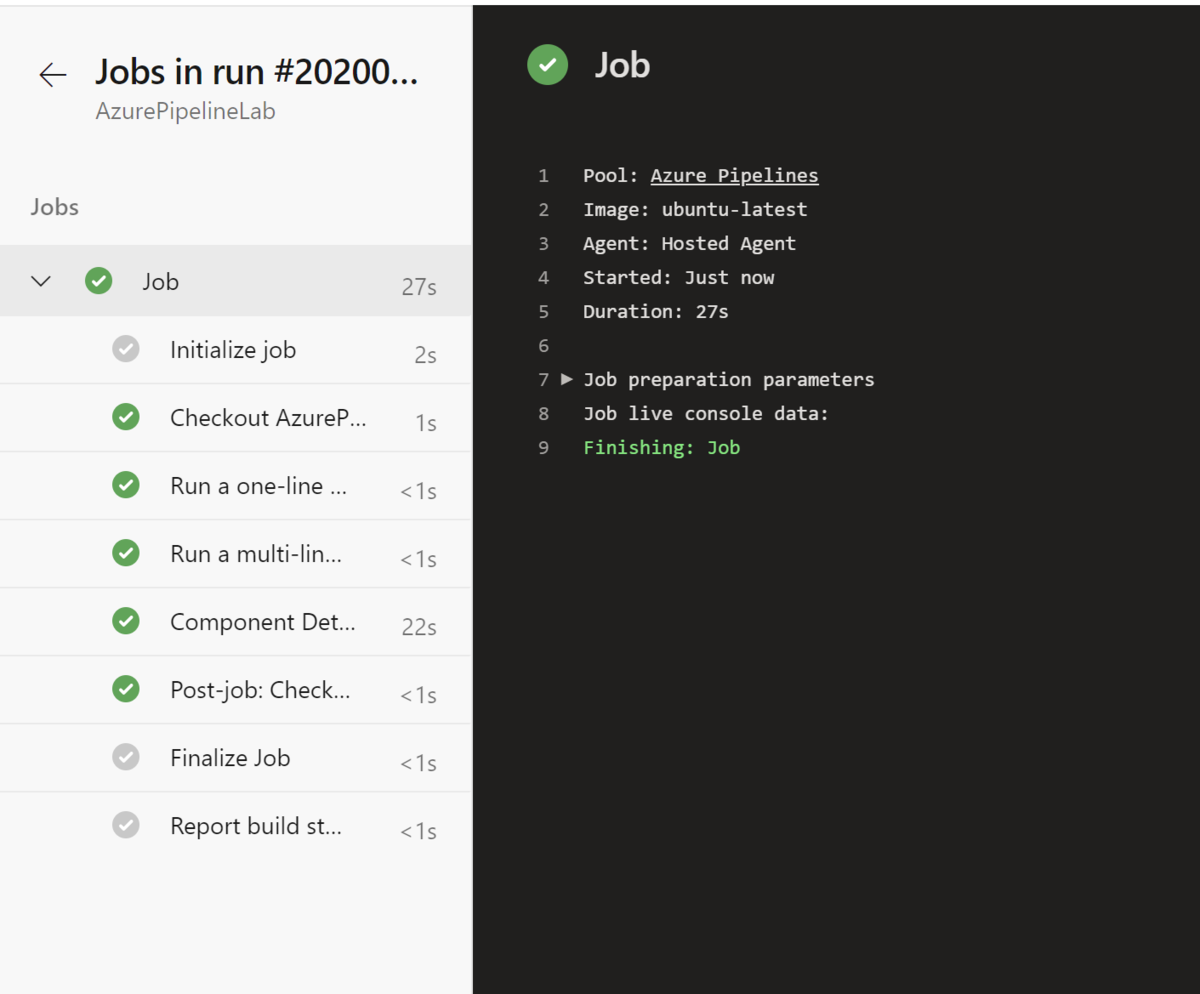
displayName:'Run a multi-line script'そのまま Save and run のボタンを押して実行してみます。しばらくすると動いて結果が表示されます。
![f:id:okazuki:20200223180708p:plain f:id:okazuki:20200223180708p:plain]()
View raw log という部分を表示すると生のログが見れます。その中を確認するとパイプライン内で書いてある echo の出力がありますね。ばっちり。
![f:id:okazuki:20200223180813p:plain f:id:okazuki:20200223180813p:plain]()
トリガー
ということで、このパイプラインですが何をきっかけにして動くの?というのがありますね。そこらへんを制御してるのが YAML の先頭にある trigger になります。
trigger:- master
これは、マスターブランチの変更をきっかけにパイプラインが動くというような定義です。他のブランチ名も配列に追加することで、複数のブランチをきっかけに動くパイプラインに出来ます。例えば以下のように YAML を書き換えると…
trigger:- master
- release/*
pool:vmImage:'ubuntu-latest'steps:- script: echo Hello, world!
displayName:'Run a one-line script'- script: |
echo Add other tasks to build, test, and deploy your project.
echo See https://aka.ms/yaml
displayName:'Run a multi-line script'release/v1.0という感じのブランチでも実行されます。例えば以下のような操作をすると…
> git checkout -b release/v1.0
> git commit --allow-empty -m "for v1.0"
> git push --set-upstream origin release/v1.0
Azure Pipeline の実行履歴に以下のように表示されます。
![f:id:okazuki:20200223182257p:plain f:id:okazuki:20200223182257p:plain]()
ばっちりですね。ちなみに includeや excludeを使ってトリガーに含めるもの、除外するものを定義することが出来ます。ドキュメントの例そのままですが release/old/*は含めないケースは以下のようになります。
trigger:branches:include:- master
    - releases/*
    exclude:- releases/old*
では、リポジトリーで以下のコマンドを打ってみて動作を確認してみましょう。
> git checkout -b release/old/v0.01
> git commit --allow-empty -m "old version"
> git push --set-upstream origin release/old/v0.01
やってみましたがパイプラインは実行されませんでした。
Azure にリソースをデプロイしてみよう
以下のリポジトリの ARM Template をデプロイしてみようと思います。
github.com
今回はちょっとスロットも使いたいなぁと思ったので、スロットの定義を上記のリポジトリのJSONに追加して以下のようにしてみました。
{"$schema": "https://schema.management.azure.com/schemas/2015-01-01/deploymentTemplate.json#",
    "contentVersion": "1.0.0.0",
    "parameters": {"webAppName": {"type": "string",
            "metadata": {"description": "Base name of the resource such as web app name and app service plan"
            },
            "minLength": 2},
        "sku": {"type": "string",
            "defaultValue": "S1",
            "metadata": {"description": "The SKU of App Service Plan, by default is Standard S1"
            }},
        "location": {"type": "string",
            "defaultValue": "[resourceGroup().location]",
            "metadata": {"description": "Location for all resources"
            }}},
    "variables": {"webAppPortalName": "[concat(parameters('webAppName'), '-webapp')]",
        "appServicePlanName": "[concat('AppServicePlan-', parameters('webAppName'))]"
    },
    "resources": [{"apiVersion": "2018-02-01",
            "type": "Microsoft.Web/serverfarms",
            "kind": "app",
            "name": "[variables('appServicePlanName')]",
            "location": "[parameters('location')]",
            "properties": {},
            "dependsOn": [],
            "sku": {"name": "[parameters('sku')]"
            }},
        {"apiVersion": "2018-11-01",
            "type": "Microsoft.Web/sites",
            "kind": "app",
            "name": "[variables('webAppPortalName')]",
            "location": "[parameters('location')]",
            "properties": {"serverFarmId": "[resourceId('Microsoft.Web/serverfarms', variables('appServicePlanName'))]"
            },
            "dependsOn": ["[resourceId('Microsoft.Web/serverfarms', variables('appServicePlanName'))]"
            ]},
        {"apiVersion": "2016-08-01",
            "type": "Microsoft.Web/sites/slots",
            "name": "[concat(variables('webAppPortalName'), '/staging')]",
            "kind": "app",
            "location": "[parameters('location')]",
            "comments": "This specifies the web app slots.",
            "tags": {"displayName": "WebAppSlots"
            },
            "properties": {"serverFarmId": "[resourceId('Microsoft.Web/serverfarms', variables('appServicePlanName'))]"
            },
            "dependsOn": ["[resourceId('Microsoft.Web/Sites', variables('webAppPortalName'))]"
            ]}]}
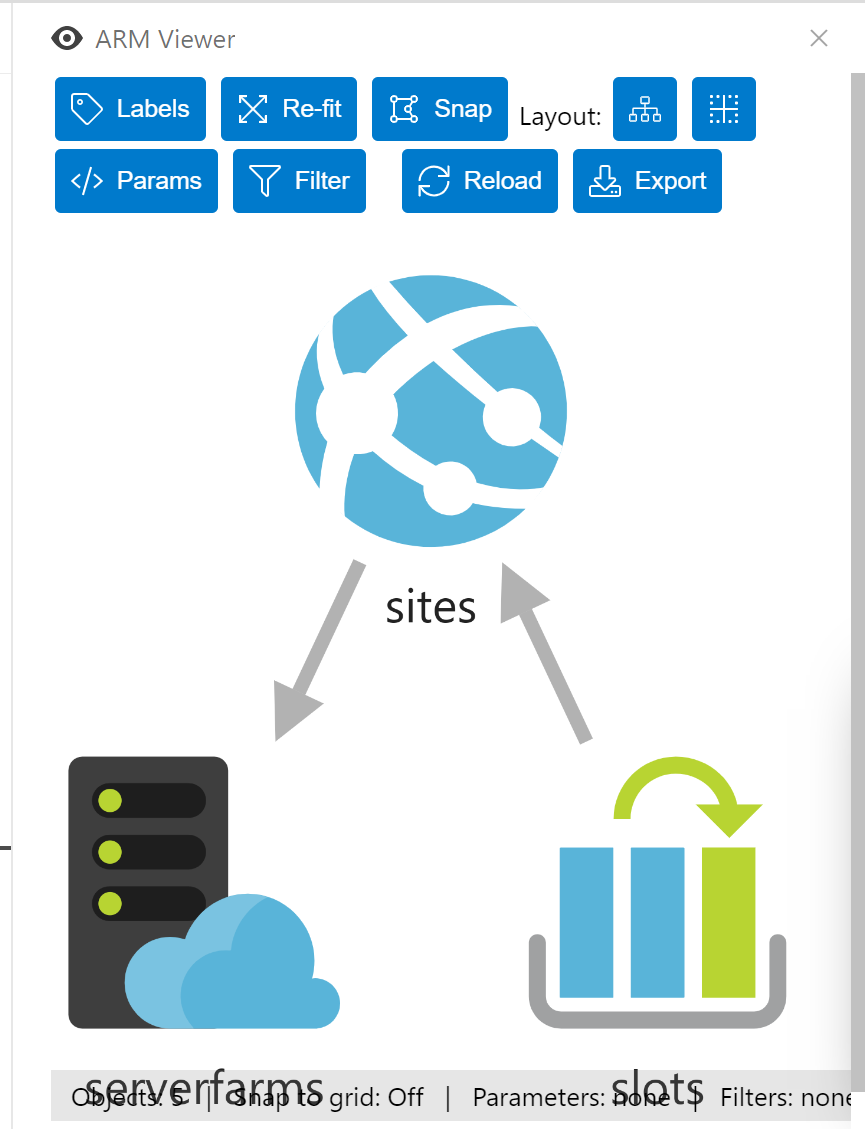
余談ですが ARM Template Viewer 拡張機能を入れると Visual Studio Code で、こんな感じで見えます。便利。
![f:id:okazuki:20200223183607p:plain f:id:okazuki:20200223183607p:plain]()
パラメーターは以下のような感じで
{"$schema": "https://schema.management.azure.com/schemas/2015-01-01/deploymentParameters.json#",
    "contentVersion": "1.0.0.0",
    "parameters": {"webAppName": {"value": "devopstestokazuki"
        }}}
出来たのでデプロイしていきます。ドキュメントは以下のページを参考にしました。
github.com
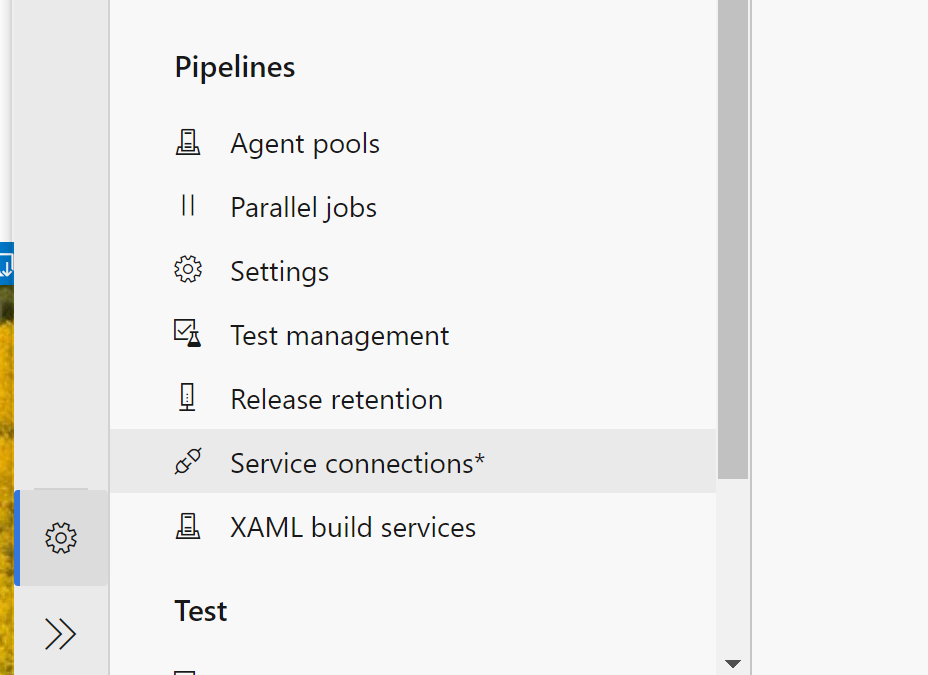
まず、デプロイ先の Azure との接続を作ります。Azure DevOps の左下にある歯車アイコンをクリックして Service connectionsを選択します。
![f:id:okazuki:20200223184524p:plain f:id:okazuki:20200223184524p:plain]()
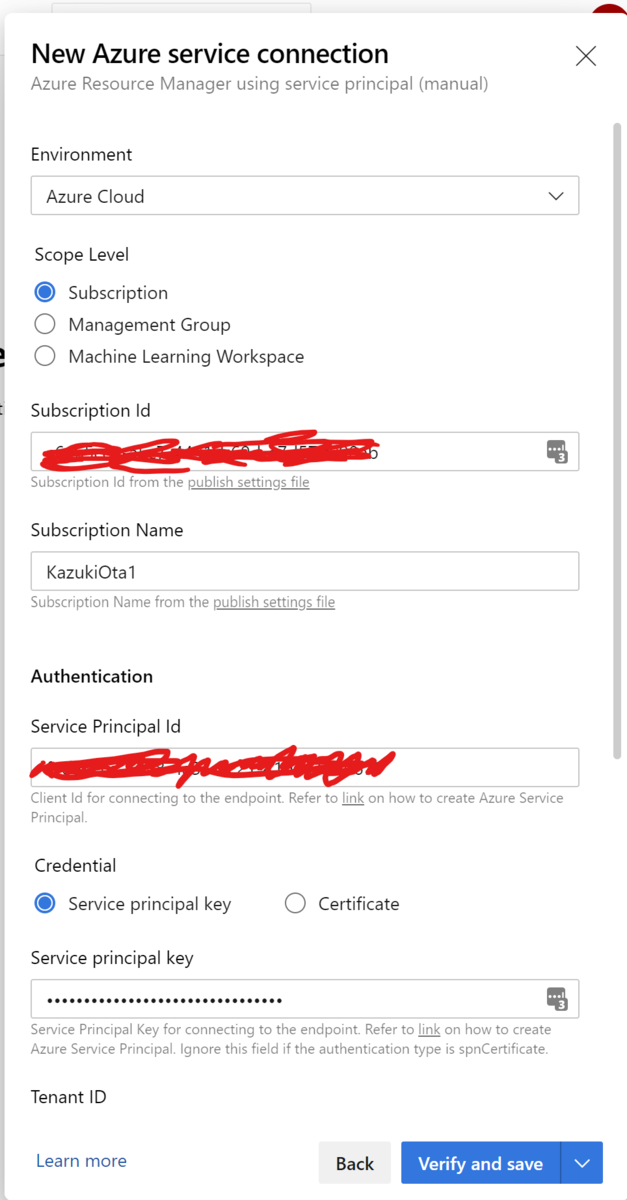
Azure Resource Managerを選択して Service principal (manual)を選びます。通常は推奨の Service principal (automatic)でいいと思いますが、今回は別テナントの Azure にデプロイしたかったのでマニュアルで各項目を設定しました。
![f:id:okazuki:20200223192405p:plain f:id:okazuki:20200223192405p:plain]()
ここに入力する情報の取得方法は、以下のブログ記事がわかりやすいと思います。
poke-dev.hatenablog.com
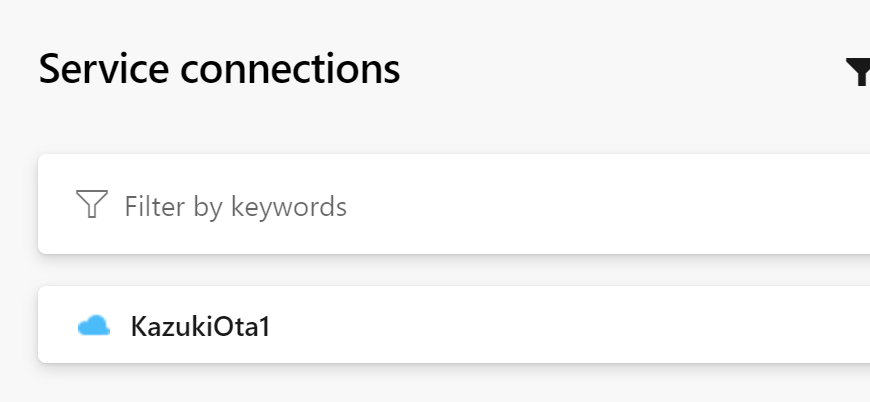
Service connections に無事追加されました。
![f:id:okazuki:20200223192513p:plain f:id:okazuki:20200223192513p:plain]()
そして、azure-pipeline.yamlに ARM テンプレートをデプロイするタスクを追加します。
trigger:branches:include:- master
- releases/*
exclude:- releases/old*
pool:vmImage:'windows-latest'steps:- task: AzureResourceManagerTemplateDeployment@3
displayName: Deploy ARM template to Azure
inputs:deploymentScope:'Resource Group'azureResourceManagerConnection:'KazukiOta1'subscriptionId:'ここにデプロイ先のサブスクリプションID'action:'Create Or Update Resource Group'resourceGroupName:'DevOpsTest-rg'location:'Japan East'templateLocation:'Linked artifact'csmFile:'azuredeploy.json'csmParametersFile:'azuredeploy.parameters.json'deploymentMode:'Incremental'では、これをコミットしてパイプラインを実行してみましょう。
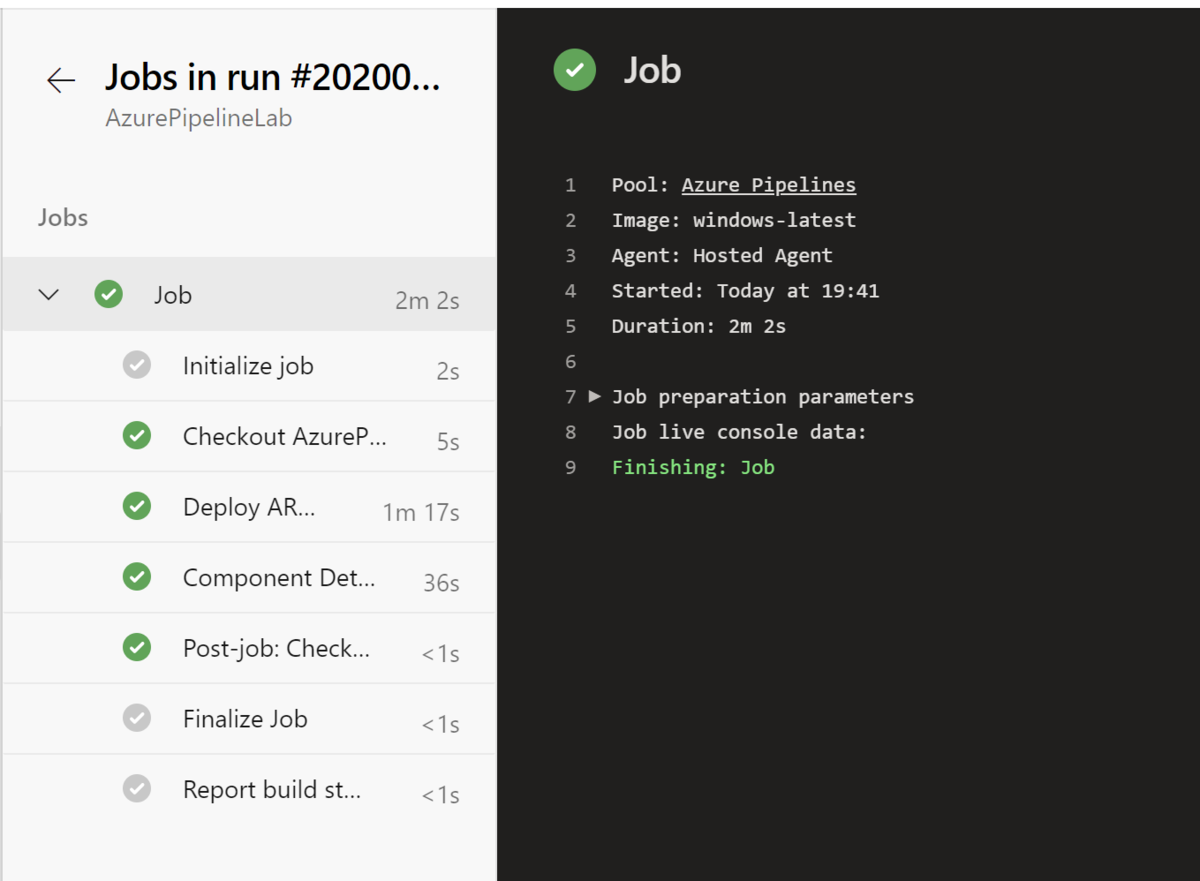
うまくいきました!!
![f:id:okazuki:20200223194329p:plain f:id:okazuki:20200223194329p:plain]()
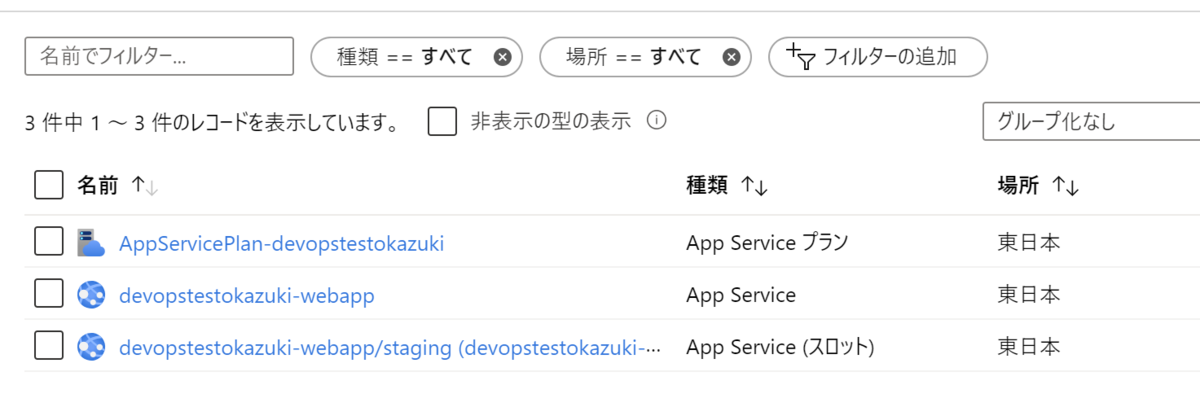
Azure ポータルを見てみると、ちゃんとリソースも出来てますね。
![f:id:okazuki:20200223194419p:plain f:id:okazuki:20200223194419p:plain]()
アプリのビルドもしてみよう
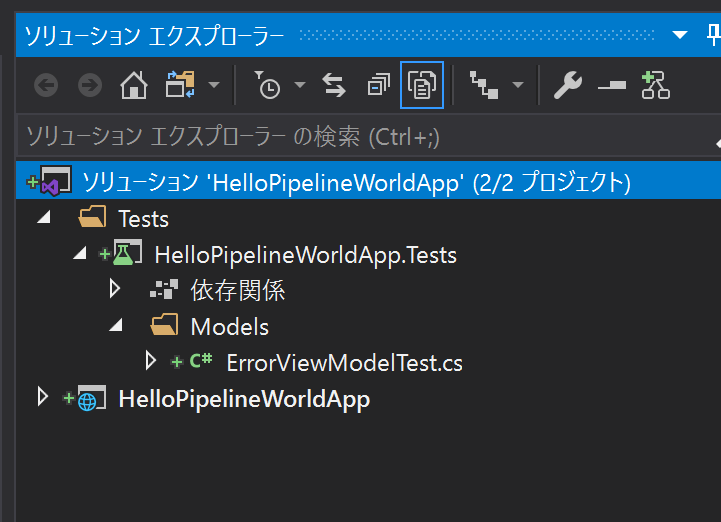
ということで、アプリもビルドしてみましょう。リポジトリに Visual Studio 2019 で ASP.NET Core MVC のアプリケーションを作ります。ついでに MSTest の単体テストプロジェクトも作ります。こんな感じで。
![f:id:okazuki:20200223195049p:plain f:id:okazuki:20200223195049p:plain]()
適当にテストコードも作っておきました。デフォルトの ErrorViewModel クラスの ShowRequestId プロパティにちょっとしたロジック(文字が空かどうかの判別)が入ってるので、それをチェックする感じにしました。
using HelloPipelineWorldApp.Models;
using Microsoft.VisualStudio.TestTools.UnitTesting;

namespace HelloPipelineWorldApp.Tests.Models
{
    [TestClass]
    publicclass ErrorViewModelTest
    {
        private ErrorViewModel target;

        [TestInitialize]
        publicvoid Setup()
        {
            target = new ErrorViewModel();
        }

        [TestCleanup]
        publicvoid TearDown()
        {
            target = null;
        }

        [TestMethod]
        publicvoid ShowRequestId_TrueCases()
        {
            target.RequestId = "xxxxx";
            Assert.IsTrue(target.ShowRequestId);
        }

        [TestMethod]
        publicvoid ShowRequestId_FalseCases()
        {
            target.RequestId = null;
            Assert.IsFalse(target.ShowRequestId);

            target.RequestId = "";
            Assert.IsFalse(target.ShowRequestId);
        }
    }
}
では、パイプラインを作っていきます。なんとなく Azure へのリソースのデプロイとアプリのビルドを同じ steps に書くのが嫌だったので、もう一段階上のグルーピングの概念の job を追加してみました。job に分割することでインフラ関連のタスク、アプリをビルドする関連のタスク、その他にアプリをデプロイするタスクを、それぞれ別々にグルーピングすることが出来るようになります。
というわけでさくっと各種タスクを追加しました。
trigger:branches:include:- master
- releases/*
exclude:- releases/old*
pool:vmImage:'windows-latest'variables:configuration: Release
jobs:- job: infrastructure
displayName: Create Azure resources
steps:- task: AzureResourceManagerTemplateDeployment@3
displayName: Deploy ARM template to Azure
inputs:deploymentScope:'Resource Group'azureResourceManagerConnection:'KazukiOta1'subscriptionId:'ここにデプロイ先のサブスクリプションID'action:'Create Or Update Resource Group'resourceGroupName:'DevOpsTest-rg'location:'Japan East'templateLocation:'Linked artifact'csmFile:'azuredeploy.json'csmParametersFile:'azuredeploy.parameters.json'deploymentMode:'Incremental'- job: build
displayName: build and test app
dependsOn: infrastructure
condition: succeeded('infrastructure')
steps:- task: DotNetCoreCLI@2
displayName: compile
inputs:command:'build'configuration: $(configuration)
projects:'**/*.csproj'- task: DotNetCoreCLI@2
inputs:command:'test'configuration: $(configuration)
projects:'**/*.Tests.csproj'- task: DotNetCoreCLI@2
displayName: test
inputs:command:'test'configuration: $(configuration)
projects:'**/*.Tests.csproj'- task: DotNetCoreCLI@2
displayName: publish
inputs:command:'publish'projects: |
'HelloPipelineWorldApp/HelloPipelineWorldApp/HelloPipelineWorldApp.csproj''HelloPipelineWorldApp/HelloPipelineWorldApp.sln'publishWebProjects:trueconfiguration: $(configuration)
modifyOutputPath:truearguments:'-o webapp'- task: PublishBuildArtifacts@1
displayName: Copy outputs
inputs:PathtoPublish: webapp
artifactName: webapp
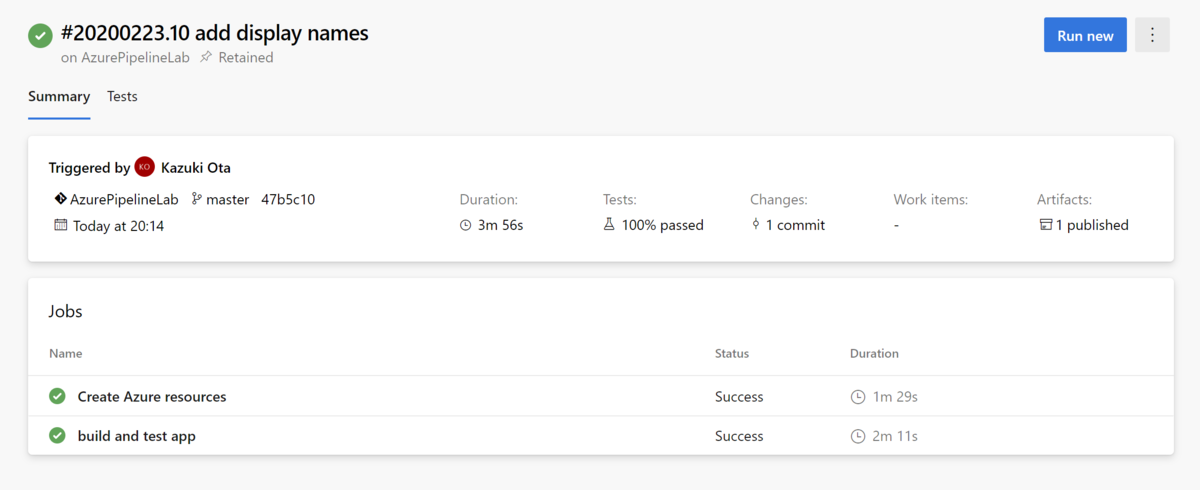
ジョブに分けたことでパイプラインの実行結果もジョブ単位で見たり出来ます。
![f:id:okazuki:20200223201853p:plain f:id:okazuki:20200223201853p:plain]()
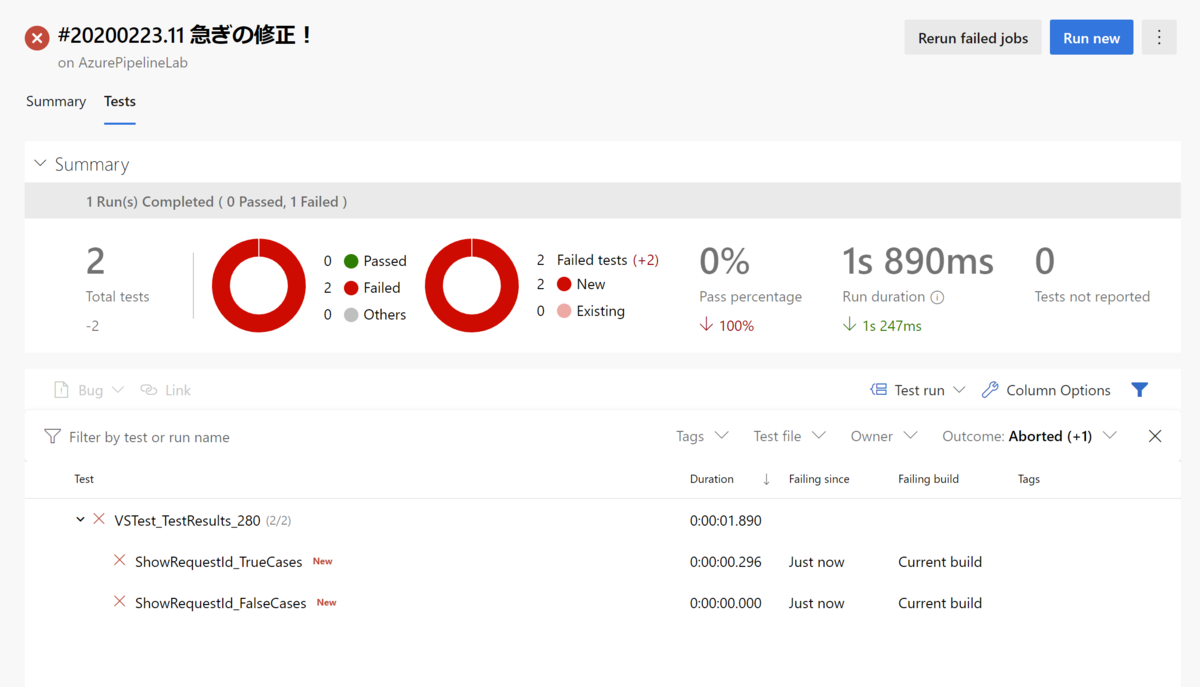
単体テストをテストするタスクも追加したので、Tests タブが追加されています。これをクリックすると単体テストのレポートが見れます。
![f:id:okazuki:20200223201939p:plain f:id:okazuki:20200223201939p:plain]()
もちろん単体テストが失敗すると、パイプライン全体として失敗になります。健全。
![f:id:okazuki:20200223202400p:plain f:id:okazuki:20200223202400p:plain]()
デプロイしよう
アプリがビルドできたら次はデプロイですね。これもデプロイ用のタスクがあるのでさくっと追加してみましょう。
trigger:branches:include:- master
- releases/*
exclude:- releases/old*
pool:vmImage:'windows-latest'variables:configuration: Release
jobs:- job: infrastructure
displayName: Create Azure resources
steps:- task: AzureResourceManagerTemplateDeployment@3
displayName: Deploy ARM template to Azure
inputs:deploymentScope:'Resource Group'azureResourceManagerConnection:'KazukiOta1'subscriptionId:'ここにデプロイ先のサブスクリプションID'action:'Create Or Update Resource Group'resourceGroupName:'DevOpsTest-rg'location:'Japan East'templateLocation:'Linked artifact'csmFile:'azuredeploy.json'csmParametersFile:'azuredeploy.parameters.json'deploymentMode:'Incremental'- job: build
displayName: build and test app
dependsOn: infrastructure
condition: succeeded('infrastructure')
steps:- task: DotNetCoreCLI@2
displayName: compile
inputs:command:'build'configuration: $(configuration)
projects:'**/*.csproj'- task: DotNetCoreCLI@2
displayName: test
inputs:command:'test'configuration: $(configuration)
projects:'**/*.Tests.csproj'- task: DotNetCoreCLI@2
displayName: test
inputs:command:'test'configuration: $(configuration)
projects:'**/*.Tests.csproj'- task: DotNetCoreCLI@2
displayName: publish
inputs:command:'publish'projects: |
'HelloPipelineWorldApp/HelloPipelineWorldApp/HelloPipelineWorldApp.csproj''HelloPipelineWorldApp/HelloPipelineWorldApp.sln'publishWebProjects:trueconfiguration: $(configuration)
modifyOutputPath:truearguments:'-o webapp'- task: PublishBuildArtifacts@1
displayName: Copy outputs
inputs:PathtoPublish: webapp
artifactName: webapp
- deployment: deploy
displayName: Deploy to staging environment and swap
environment:name: stating
dependsOn: build
condition: succeeded('build')
strategy:runOnce:deploy:steps:- task: AzureWebApp@1
inputs:azureSubscription:'KazukiOta1'appType:'webApp'appName:'devopstestokazuki-webapp'deployToSlotOrASE:trueresourceGroupName:'DevOpsTest-rg'slotName:'staging'package:'$(Pipeline.Workspace)/webapp/**/*.zip'deploymentMethod:'runFromPackage'- task: AzureAppServiceManage@0
inputs:azureSubscription:'KazukiOta1'Action:'Swap Slots'WebAppName:'devopstestokazuki-webapp'ResourceGroupName:'DevOpsTest-rg'SourceSlot:'staging'結構長くなってきましたね…
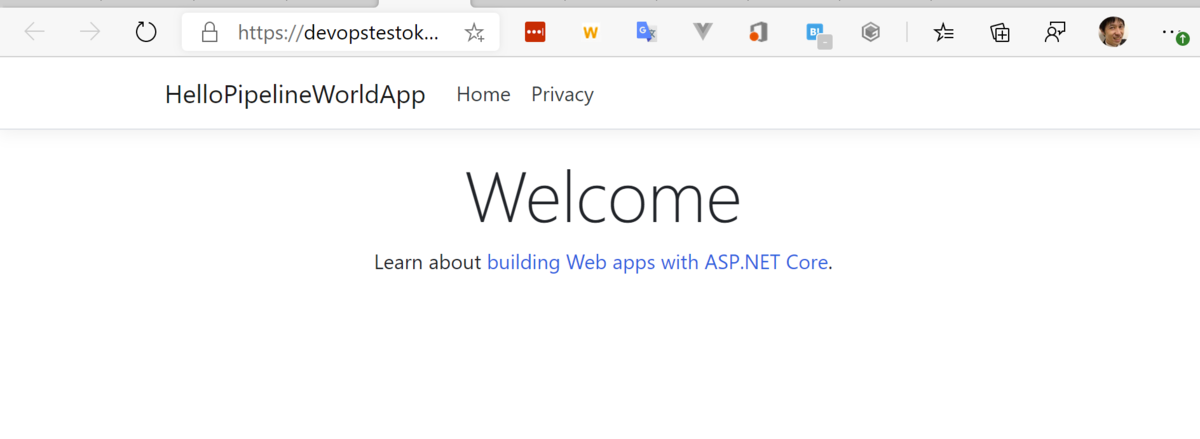
master ブランチに push するとちゃんと本番までデプロイされてました。
![f:id:okazuki:20200223205409p:plain f:id:okazuki:20200223205409p:plain]()
本当はスワップする前に Selenium とかでの E2E テストとかも走るといいのかもしれないですね。
さて、更新の確認のため Welcome の文字列を Welcome v2 になるように編集して…
![f:id:okazuki:20200223205502p:plain f:id:okazuki:20200223205502p:plain]()
コミットして push してみましょう。しばらく待ってページを確認すると…
![f:id:okazuki:20200223210407p:plain f:id:okazuki:20200223210407p:plain]()
ばっちり!!ステージングの方を見ると古いページが表示されました。これもばっちり。
人による承認をトリガーにしたい
ドキュメント的にはここらへん。
docs.microsoft.com
ステージングにデプロイしてからプロダクションとスワップする前に人の手による承認がしたい!っていうのは世の常ですよね。やってみましょう。
そのために、今はデプロイとスワップが同じ deployment タスクになっていたのを別々にしたいと思います。
trigger:branches:include:- master
- releases/*
exclude:- releases/old*
pool:vmImage:'windows-latest'variables:configuration: Release
jobs:- job: infrastructure
displayName: Create Azure resources
steps:- task: AzureResourceManagerTemplateDeployment@3
displayName: Deploy ARM template to Azure
inputs:deploymentScope:'Resource Group'azureResourceManagerConnection:'KazukiOta1'subscriptionId:'ここにデプロイ先のサブスクリプションID'action:'Create Or Update Resource Group'resourceGroupName:'DevOpsTest-rg'location:'Japan East'templateLocation:'Linked artifact'csmFile:'azuredeploy.json'csmParametersFile:'azuredeploy.parameters.json'deploymentMode:'Incremental'- job: build
displayName: build and test app
dependsOn: infrastructure
condition: succeeded('infrastructure')
steps:- task: DotNetCoreCLI@2
displayName: compile
inputs:command:'build'configuration: $(configuration)
projects:'**/*.csproj'- task: DotNetCoreCLI@2
displayName: test
inputs:command:'test'configuration: $(configuration)
projects:'**/*.Tests.csproj'- task: DotNetCoreCLI@2
displayName: test
inputs:command:'test'configuration: $(configuration)
projects:'**/*.Tests.csproj'- task: DotNetCoreCLI@2
displayName: publish
inputs:command:'publish'projects: |
'HelloPipelineWorldApp/HelloPipelineWorldApp/HelloPipelineWorldApp.csproj''HelloPipelineWorldApp/HelloPipelineWorldApp.sln'publishWebProjects:trueconfiguration: $(configuration)
modifyOutputPath:truearguments:'-o webapp'- task: PublishBuildArtifacts@1
displayName: Copy outputs
inputs:PathtoPublish: webapp
artifactName: webapp
- deployment: deploy_to_staging_environment
displayName: Deploy to staging environment
environment:name: stating
dependsOn: build
condition: succeeded('build')
strategy:runOnce:deploy:steps:- task: AzureWebApp@1
inputs:azureSubscription:'KazukiOta1'appType:'webApp'appName:'devopstestokazuki-webapp'deployToSlotOrASE:trueresourceGroupName:'DevOpsTest-rg'slotName:'staging'package:'$(Pipeline.Workspace)/webapp/**/*.zip'deploymentMethod:'runFromPackage'- deployment: deploy_to_production_environment
displayName: Deploy to production environment
environment:name: production
dependsOn: deploy_to_staging_environment
condition: succeeded('deploy-to-staging-environment')
strategy:runOnce:deploy:steps:- task: AzureAppServiceManage@0
inputs:azureSubscription:'KazukiOta1'Action:'Swap Slots'WebAppName:'devopstestokazuki-webapp'ResourceGroupName:'DevOpsTest-rg'SourceSlot:'staging'そして、Azure Pipelines の Environments に行きます。
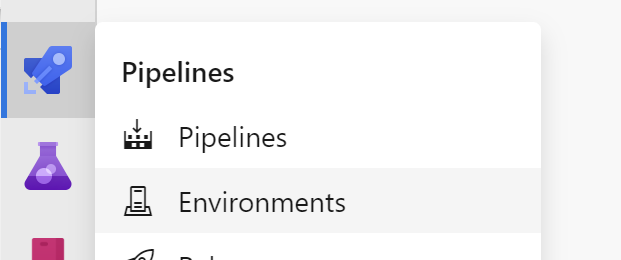
![f:id:okazuki:20200223211604p:plain f:id:okazuki:20200223211604p:plain]()
staging と production を New environment ボタンから作ります。ここまでの手順を追ってきた人は多分 staging は作られていると思います。yaml の deployment タスクで指定した environment がここに出てきます。今回は production に対して手動認証を追加します。
![f:id:okazuki:20200223211647p:plain f:id:okazuki:20200223211647p:plain]()
production を選択して画面右上の縦に点が 3 つ並んだボタンを押して Approvals and checks を選択します。
![f:id:okazuki:20200223211837p:plain f:id:okazuki:20200223211837p:plain]()
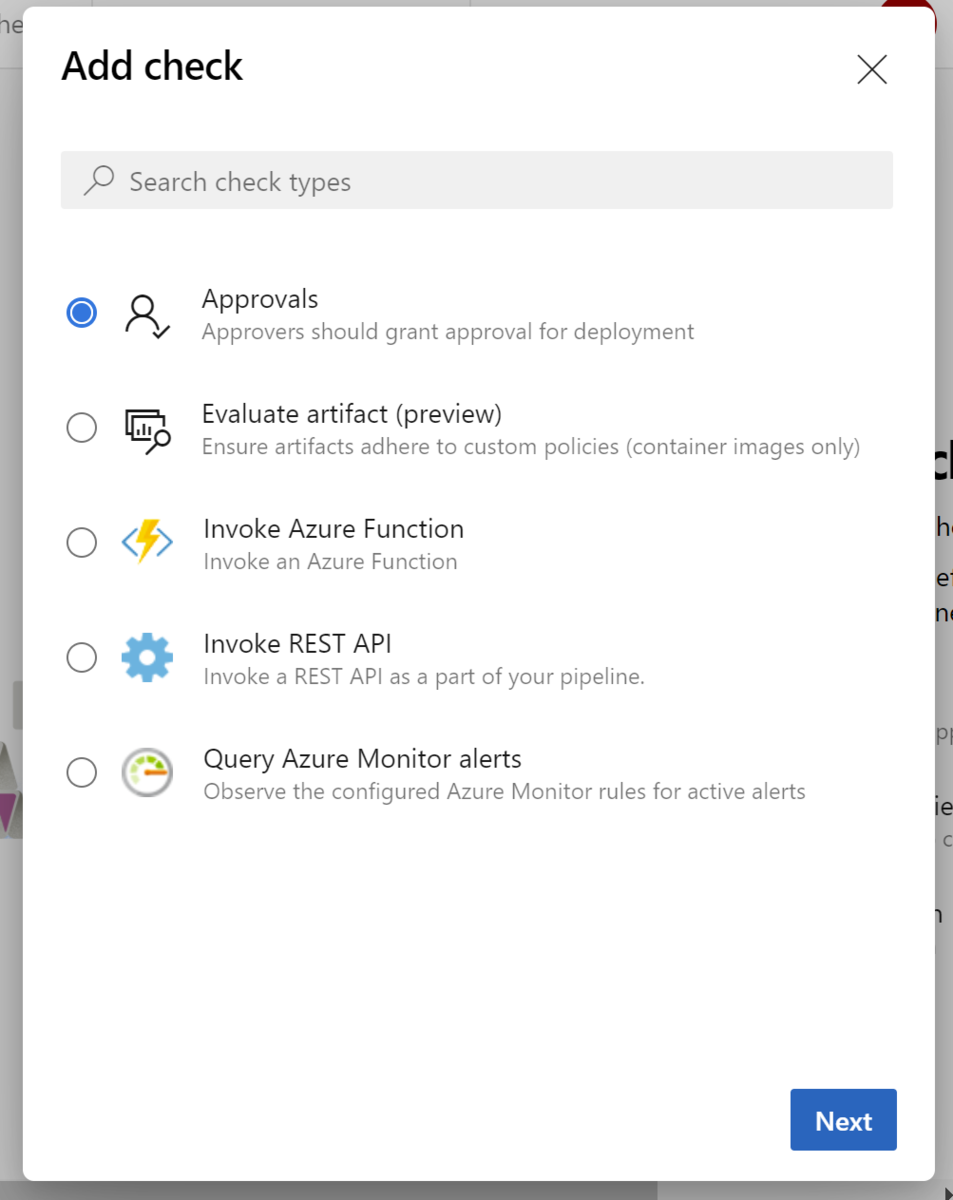
画面右上の +ボタンを押すと以下のような画面が出るので Approvals を選択してる状態で Next を選択。
![f:id:okazuki:20200223211927p:plain f:id:okazuki:20200223211927p:plain]()
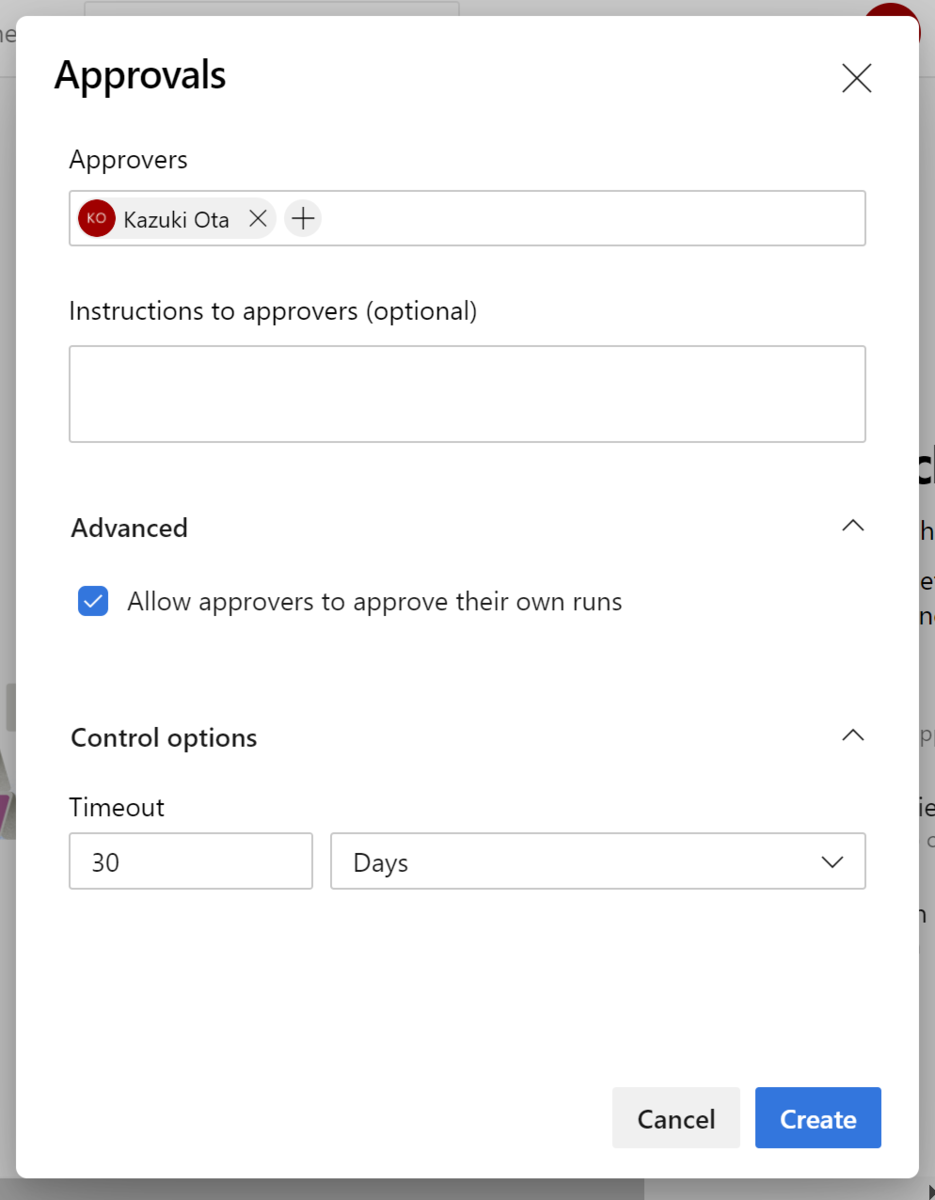
誰に承認権限を与えるかなどを設定して Create を押しましょう。
![f:id:okazuki:20200223212012p:plain f:id:okazuki:20200223212012p:plain]()
では、v3 になるようにソースコードを変更して commit & push します。
そして、これではだめでした。パイプライン全体がペンディングになってしまいました。
![f:id:okazuki:20200223214134p:plain f:id:okazuki:20200223214134p:plain]()
マニュアルでの承認を特定の Environment に適用すると、その Environment に影響を与える可能性のあるパイプラインの実行自体が承認があるまで停止するみたいですね。
なので、今回のケースでは production 環境への変更時のみ人の手による認証がしたいので、該当部分の swap 部分を別のパイプラインとして作成して、ビルドとステージング環境へのデプロイのパイプラインが完了したタイミングで実行するように構成すればよいということになります。
なので、azure-pipelines.ymlから swap 部分を取り除いて以下のようにします。
trigger:branches:include:- master
- releases/*
exclude:- releases/old*
pool:vmImage:'windows-latest'variables:configuration: Release
jobs:- job: infrastructure
displayName: Create Azure resources
steps:- task: AzureResourceManagerTemplateDeployment@3
displayName: Deploy ARM template to Azure
inputs:deploymentScope:'Resource Group'azureResourceManagerConnection:'KazukiOta1'subscriptionId:'ここにデプロイ先のサブスクリプションID'action:'Create Or Update Resource Group'resourceGroupName:'DevOpsTest-rg'location:'Japan East'templateLocation:'Linked artifact'csmFile:'azuredeploy.json'csmParametersFile:'azuredeploy.parameters.json'deploymentMode:'Incremental'- job: build
displayName: build and test app
dependsOn: infrastructure
condition: succeeded('infrastructure')
steps:- task: DotNetCoreCLI@2
displayName: compile
inputs:command:'build'configuration: $(configuration)
projects:'**/*.csproj'- task: DotNetCoreCLI@2
displayName: test
inputs:command:'test'configuration: $(configuration)
projects:'**/*.Tests.csproj'- task: DotNetCoreCLI@2
displayName: test
inputs:command:'test'configuration: $(configuration)
projects:'**/*.Tests.csproj'- task: DotNetCoreCLI@2
displayName: publish
inputs:command:'publish'projects: |
'HelloPipelineWorldApp/HelloPipelineWorldApp/HelloPipelineWorldApp.csproj''HelloPipelineWorldApp/HelloPipelineWorldApp.sln'publishWebProjects:trueconfiguration: $(configuration)
modifyOutputPath:truearguments:'-o webapp'- task: PublishBuildArtifacts@1
displayName: Copy outputs
inputs:PathtoPublish: webapp
artifactName: webapp
- deployment: deploy_to_staging_environment
displayName: Deploy to staging environment
environment:name: stating
dependsOn: build
condition: succeeded('build')
strategy:runOnce:deploy:steps:- task: AzureWebApp@1
inputs:azureSubscription:'KazukiOta1'appType:'webApp'appName:'devopstestokazuki-webapp'deployToSlotOrASE:trueresourceGroupName:'DevOpsTest-rg'slotName:'staging'package:'$(Pipeline.Workspace)/webapp/**/*.zip'deploymentMethod:'runFromPackage'そして、Azure DevOps のパイプラインのページから、もう1つパイプラインを追加します。そして、中身を以下のようにしてデプロイ部分だけを移植します。このとき trigger を none にして特定ブランチへの push などでは動かないようにして resources で AzurePipelineLab パイプラインをきっかけに動くようにします。
trigger: none
resources:pipelines:- pipeline: build_and_deploy_to_staging
    source: AzurePipelineLab
    trigger:branches:- master

pool:vmImage:'windows-latest'jobs:- deployment: deploy_to_production_environment
    displayName: Deploy to production environment
    environment:name: production
    strategy:runOnce:deploy:steps:- task: AzureAppServiceManage@0
              inputs:azureSubscription:'KazukiOta1'Action:'Swap Slots'WebAppName:'devopstestokazuki-webapp'ResourceGroupName:'DevOpsTest-rg'SourceSlot:'staging'
こんな感じにします。
master ブランチに push すると Swap 用のパイプラインがずっとペンディング状態になります。
![f:id:okazuki:20200223231422p:plain f:id:okazuki:20200223231422p:plain]()
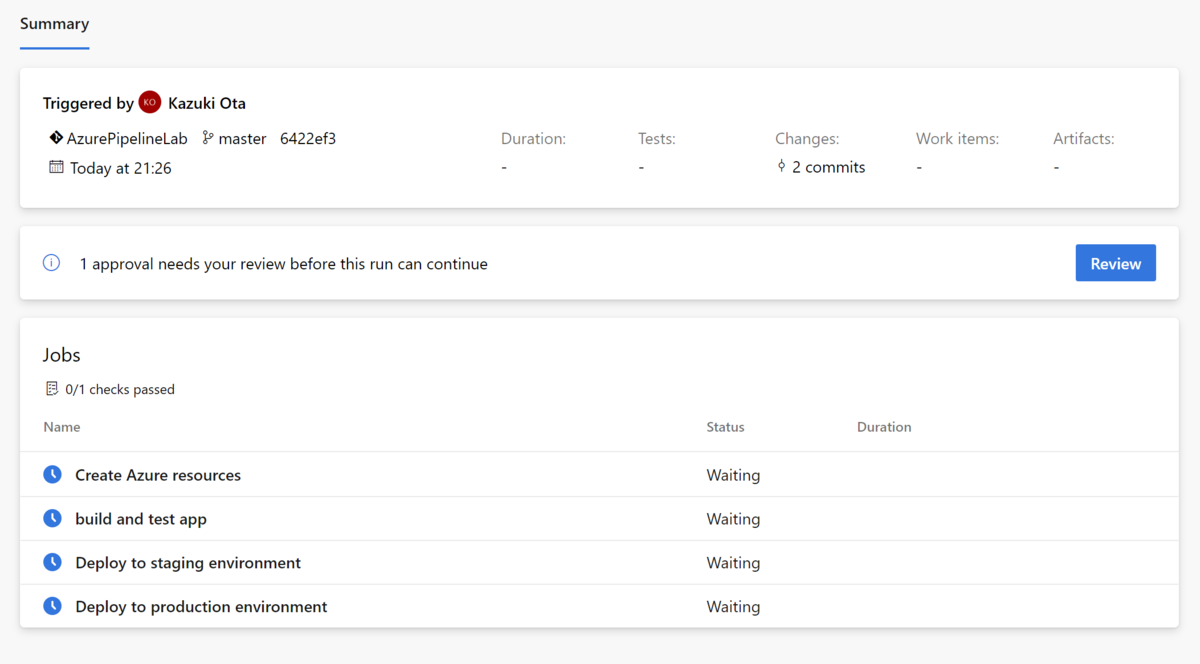
ペンディング状態のものを見てみると承認が必要と表示されてますね。
![f:id:okazuki:20200223231523p:plain f:id:okazuki:20200223231523p:plain]()
アプルーブ!!
![f:id:okazuki:20200223231642p:plain f:id:okazuki:20200223231642p:plain]()
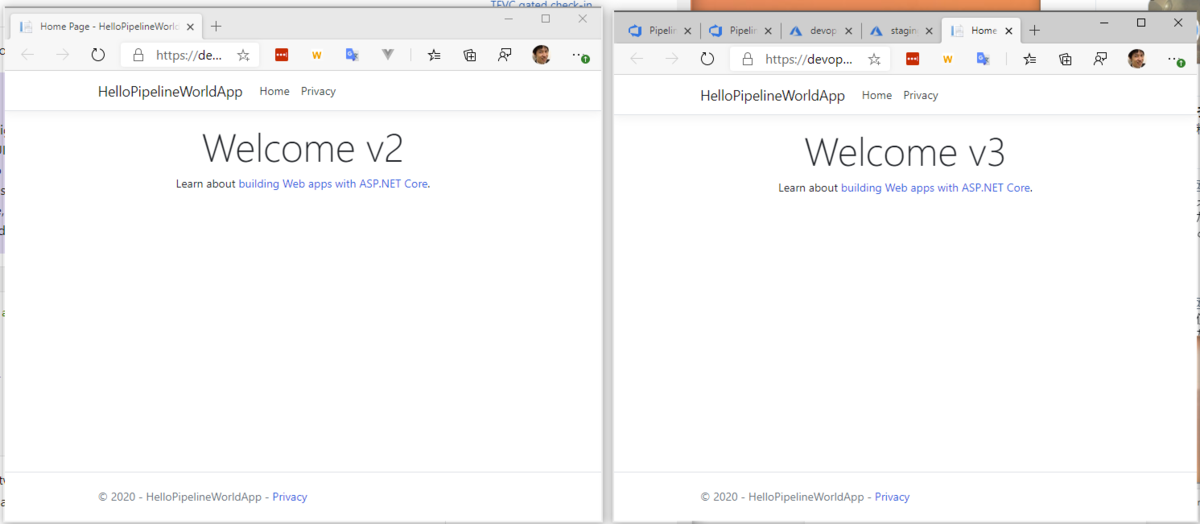
ちゃんとアプルーブすると本番が v3 になってステージングが v2 になりました。入れ替わったね。
![f:id:okazuki:20200223232134p:plain f:id:okazuki:20200223232134p:plain]()
まとめ
ということで environment と pipeline をトリガーにして複数パイプラインを連携させることで昔の Release pipeline でやってたような手動承認が出来るようになりました。


